

Ok first off let me say i didn't want to start a new thread, but the last one kind of went off topic so i wanted to start on a clean slate. Thanks greatly to m3grady2 for biting the bullet and buying the headlights first. I got a lot of info from him and he helped me a lot through this. His thread, with some other information/pics can be found here. If you have non-installation comments or questions, post on this thread, this one should be more for the install itself. However i found an easier way to do this so I'm going to lay it out the best i can. If you want to get the best out of this how to, please read the ENTIRE THING before proceeding. Sometimes i elude to things that i later explain or give precautions that you might want to yield to.
Another thing, this how-to basically connects the halos/leds to the sidemarker harness. the new lamps dont have a sidemarker so its not a problem. if you want to wire the halos/leds to a switch, then check this thread written by Yocrew for help. This how-to requires NO additional wiring to your system. it is completely, 100% plug and play.
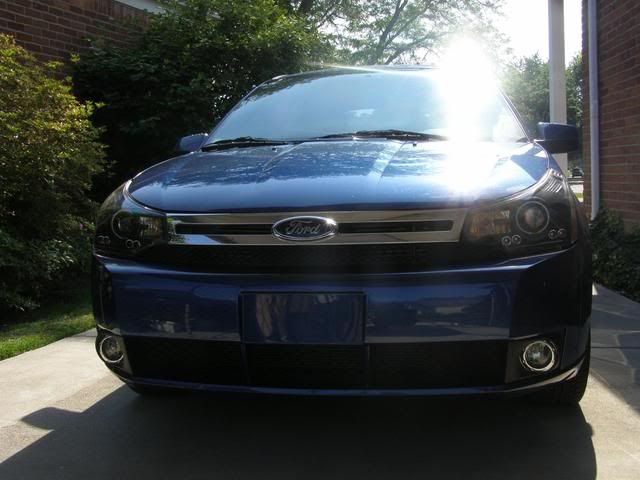
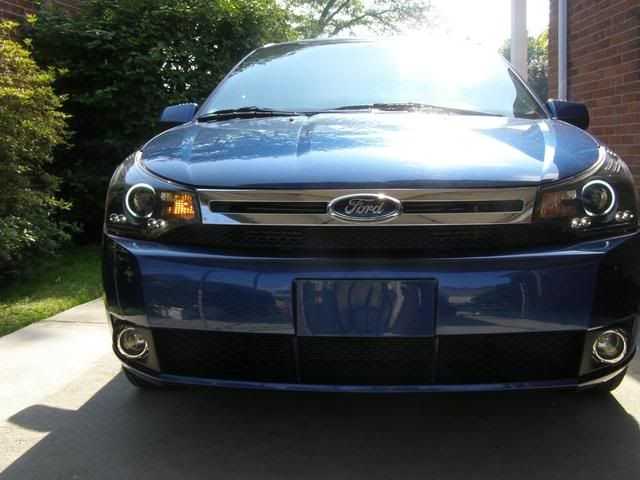
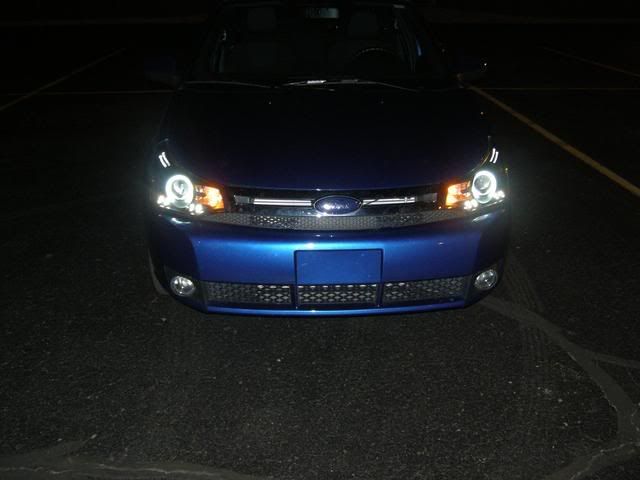
First off, there have been several ebay dealers that have the headlamps, all of them charge $350 for them, and they all are the same product. I've found them on other websites, but they are usually way more expensive, and the product is not any different. I bought them from K2Motor here, mostly because they had given me their phone number after i first inquired their product. I called and e-mailed them a bunch of times because i had a lot of questions, they were super helpful. They also have a 30 day money back guarantee saying that they will refund your money if you don't like them. You're probably thinking $350 for headlights, that's way to expensive. Well yes, that is, but you get what you pay for. These not only improved the look of my car, but the lighting itself definitely increased. I'm a college kid with little disposable income so it not like i thought hard whether it was worth it or not, it is.
It took me a full week to get them but they provided me with a UPS tracking number. It came in a big brown box and was heavily cushioned, not cheap packaging by any means. The box looks boring so i won't post pictures of that.
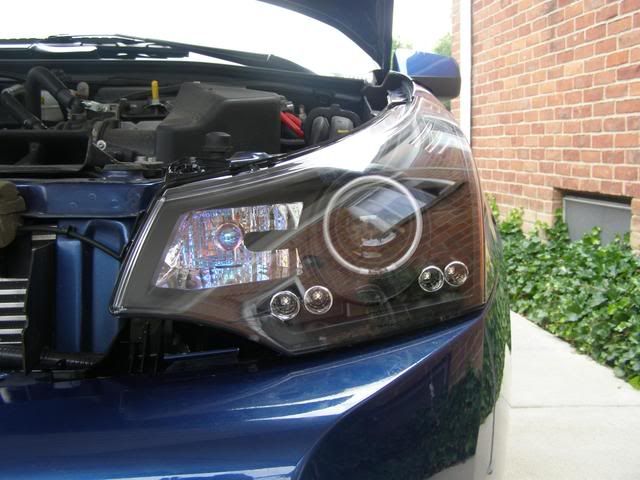
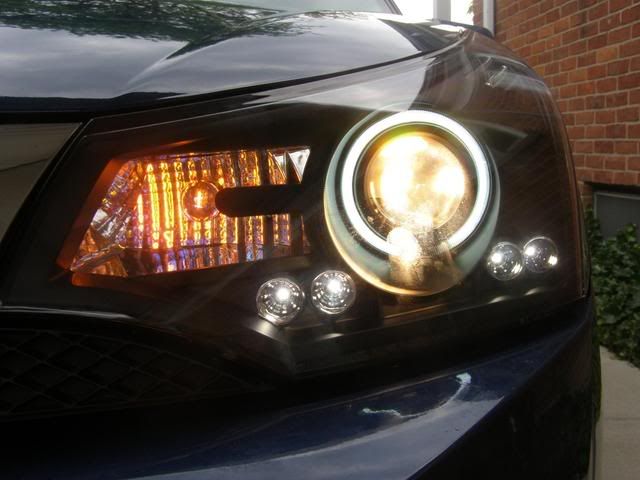
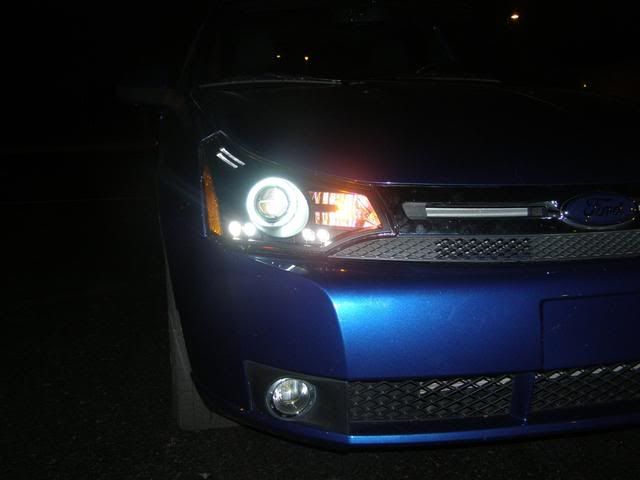
Next off the lamps themselves. You can read the link above with more info, but they aren't anything different than other halo projectors. They are a single CCFL halo around a projector and 4 leds below them. I'll comment more on that later. M3grady2 has a bunch of pictures of the lamps when he first got them, so click the first link of them not installed. I was too excited on the other hand and went straight for the install!
After receiving them, you'll need a couple things. One, you'll need to know how to remove the grill and old head lights. Go to the how-to by BradWhite here. On a side note, if you ever have any questions about anything, ask Brad. He's answered a ton of stupid questions i've had and has been nothing but courteous, thanks Brad!
I used a mini crow bar to take off all the black clips on the grill. The bolts on the headlight are 13/32 hexheads, so you'll need that size socket. I also need a pair of pliers to bend a piece of metal. That is all you'll really need for this. I didn't disconnect the battery, as i wanted to turn on the lights at certain times to make sure they worked.
Ok after taking off the headlights you'll want to look at the cords coming out of the headlight, there are three. All three wires have the same set up, they have a connector, which comes from the car to the headlight, then there is a little (about a inch thick) adapter, followed by that bulb which is attached to the adapter, then goes into the car. Twist counterclockwise to get the bulb out.
They look like this
![Image]()
The one on the far left is the parking light, then the headlight (the adapter isn't on their since i broke it because i didnt take my time so now i have to electrical tape it to get it work now lol), then the sidemarker is on the far right. You'll want to take off only the headlight bulb and leave the adapter on, you won't need that headlight for anything anymore. If you do want to keep it, take it off with some kind of latex gloves, do not touch the headlight bulb with your fingers. If you do, you must wipe them off with rubbing alcohol before using again or the grease from your fingers will damage the bulb. Take off the adapter and bulb of the parking lights. You won't need the adapter anymore, they give you one. You MAY use your old parking light if you'd like, i bought the silverstar signal lights for my old headlights, so they look blue and flash amber and i wanted to keep those. 3457 sized bulb is reversible with 3157. Next, take off the bulb and the adapter of the sidemarker. Disconnect the sidemarker from the bulb, because youll need that adapter for the next step, it looks like this:
![Image]()
![Image]()
At this point, you can put the old headlight and the things i mentioned above away, as you won't need them anymore. You will then need to grab the new headlamps and find the red tab coming out of the back.
![Image]()
If you take a closer look at it, it has two metal "things" on the left hand side of the tab.
![Image]()
You need to make the metal "things" be on the right side, like this
![Image]()
The easiest way to do this is to first use your nail to move it "flip" it over to the opposite side. Once you get it on the right side, use some pliers to push it flat to the tab (like in above picture), so it looks like it came that way. Then, plug that into the sidemarker adapter you removed earlier, like this
![Image]()
It may be hard to get in at first, so you might need to make the metal "thing" lay more flat, but it will go in there. I received a picture of this with my kit, but it was a little bit different.
From there you are ready to connect the headlamp to the car. Connect the harness to the corresponding adapter at the back of the headlight. I think this is self explanatory, you'll know its wrong when they don't fit. It'll be like putting a triangle into a circle opening.
Before you go and try to put the headlamp back in its place, check to make sure everything is on and working. I didn't do this and realized one of my adapters wasn't all the way in, so i had to take apart the grill and screws all over again after i put everything away.
You'll notice a bunch of loose wires coming from the bottom like this
![Image]()
I went and simply zip tied them together so nothing was hanging loose.
![Image]()
You'll notice a black square with 3m double tape on one side. That should be fastened to either the car or the bottom of the headlight. I did it to the bottom, but either way it shouldn't just be hanging down in the open.
Putting the headlight back in, i did have one problem getting it in. It seems the bottom metal fastener is not aligned the same way as the old headlight.
![Image]()
I had to get a pair of scissors (anything long and somewhat pointed will work) and push the metal fastener in its hole as i pushed the headlamp back in. If you don't be careful, that fastener can scratch your car, like it did mine.
![Image]()
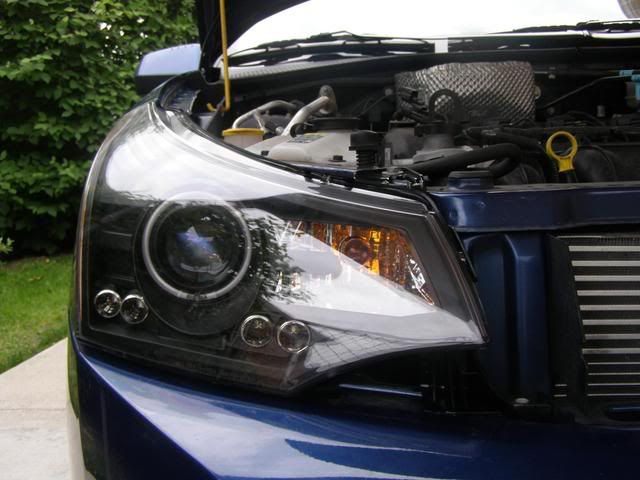
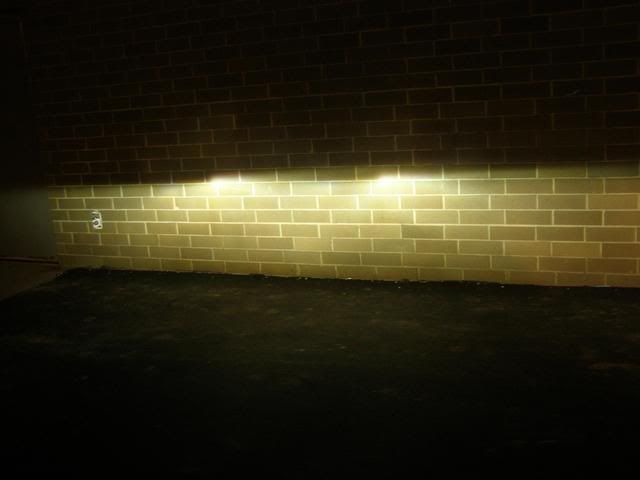
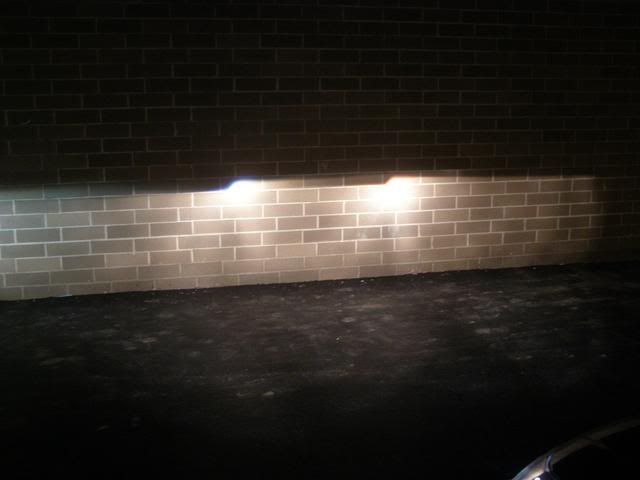
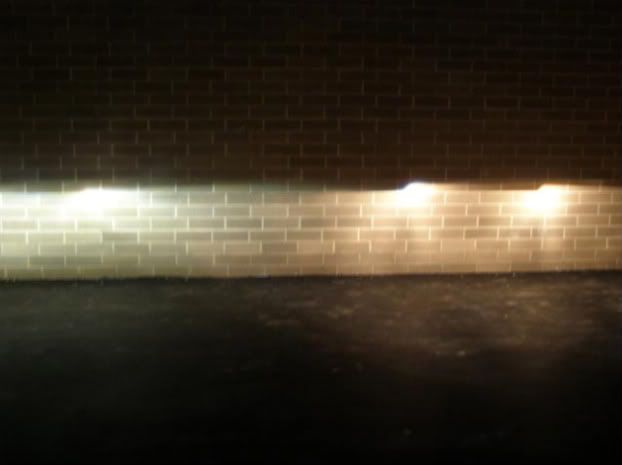
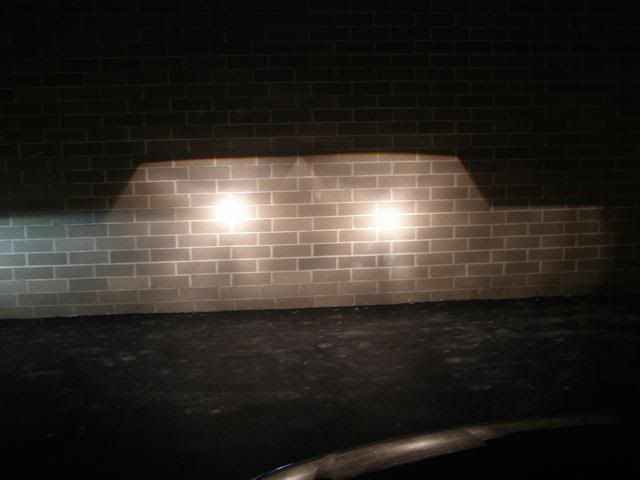
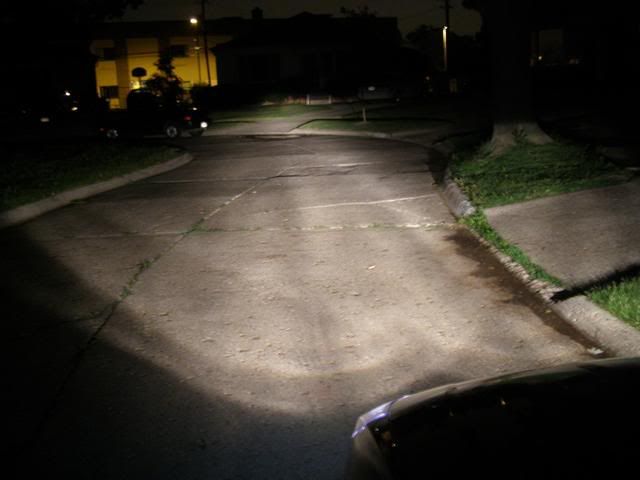
That pretty much wraps up the install. You will want to level the headlights as they probably arent the right height (my right one was a good half foot higher than the right). Both mine and m3grady2's were aimed really low from the factory. If you put your car in front of a wall you'll notice one line is higher than the other. There is a screw on the top of the headlight that will adjust the projector up and down. I'm pretty sure there is a diagram in your owner's manual at the correct way to do this, but i just put my car next to my dads and lined it up to his.
![Image]()
Any other questions, feel free to shoot me a PM. I'm sure m3grady2 will be able to help you out with anything as well. My photobucket account is here, there are more pictures there that can help you if you have trouble. I tried resizing these to make it small, so if you need a bigger picture of it to see it better, i'll PM you it.
I'll post other comments/pictures in the next post.
</body>
</html>
Another thing, this how-to basically connects the halos/leds to the sidemarker harness. the new lamps dont have a sidemarker so its not a problem. if you want to wire the halos/leds to a switch, then check this thread written by Yocrew for help. This how-to requires NO additional wiring to your system. it is completely, 100% plug and play.
First off, there have been several ebay dealers that have the headlamps, all of them charge $350 for them, and they all are the same product. I've found them on other websites, but they are usually way more expensive, and the product is not any different. I bought them from K2Motor here, mostly because they had given me their phone number after i first inquired their product. I called and e-mailed them a bunch of times because i had a lot of questions, they were super helpful. They also have a 30 day money back guarantee saying that they will refund your money if you don't like them. You're probably thinking $350 for headlights, that's way to expensive. Well yes, that is, but you get what you pay for. These not only improved the look of my car, but the lighting itself definitely increased. I'm a college kid with little disposable income so it not like i thought hard whether it was worth it or not, it is.
It took me a full week to get them but they provided me with a UPS tracking number. It came in a big brown box and was heavily cushioned, not cheap packaging by any means. The box looks boring so i won't post pictures of that.
Next off the lamps themselves. You can read the link above with more info, but they aren't anything different than other halo projectors. They are a single CCFL halo around a projector and 4 leds below them. I'll comment more on that later. M3grady2 has a bunch of pictures of the lamps when he first got them, so click the first link of them not installed. I was too excited on the other hand and went straight for the install!
After receiving them, you'll need a couple things. One, you'll need to know how to remove the grill and old head lights. Go to the how-to by BradWhite here. On a side note, if you ever have any questions about anything, ask Brad. He's answered a ton of stupid questions i've had and has been nothing but courteous, thanks Brad!
I used a mini crow bar to take off all the black clips on the grill. The bolts on the headlight are 13/32 hexheads, so you'll need that size socket. I also need a pair of pliers to bend a piece of metal. That is all you'll really need for this. I didn't disconnect the battery, as i wanted to turn on the lights at certain times to make sure they worked.
Ok after taking off the headlights you'll want to look at the cords coming out of the headlight, there are three. All three wires have the same set up, they have a connector, which comes from the car to the headlight, then there is a little (about a inch thick) adapter, followed by that bulb which is attached to the adapter, then goes into the car. Twist counterclockwise to get the bulb out.
They look like this

The one on the far left is the parking light, then the headlight (the adapter isn't on their since i broke it because i didnt take my time so now i have to electrical tape it to get it work now lol), then the sidemarker is on the far right. You'll want to take off only the headlight bulb and leave the adapter on, you won't need that headlight for anything anymore. If you do want to keep it, take it off with some kind of latex gloves, do not touch the headlight bulb with your fingers. If you do, you must wipe them off with rubbing alcohol before using again or the grease from your fingers will damage the bulb. Take off the adapter and bulb of the parking lights. You won't need the adapter anymore, they give you one. You MAY use your old parking light if you'd like, i bought the silverstar signal lights for my old headlights, so they look blue and flash amber and i wanted to keep those. 3457 sized bulb is reversible with 3157. Next, take off the bulb and the adapter of the sidemarker. Disconnect the sidemarker from the bulb, because youll need that adapter for the next step, it looks like this:


At this point, you can put the old headlight and the things i mentioned above away, as you won't need them anymore. You will then need to grab the new headlamps and find the red tab coming out of the back.

If you take a closer look at it, it has two metal "things" on the left hand side of the tab.

You need to make the metal "things" be on the right side, like this

The easiest way to do this is to first use your nail to move it "flip" it over to the opposite side. Once you get it on the right side, use some pliers to push it flat to the tab (like in above picture), so it looks like it came that way. Then, plug that into the sidemarker adapter you removed earlier, like this

It may be hard to get in at first, so you might need to make the metal "thing" lay more flat, but it will go in there. I received a picture of this with my kit, but it was a little bit different.
From there you are ready to connect the headlamp to the car. Connect the harness to the corresponding adapter at the back of the headlight. I think this is self explanatory, you'll know its wrong when they don't fit. It'll be like putting a triangle into a circle opening.
Before you go and try to put the headlamp back in its place, check to make sure everything is on and working. I didn't do this and realized one of my adapters wasn't all the way in, so i had to take apart the grill and screws all over again after i put everything away.
You'll notice a bunch of loose wires coming from the bottom like this

I went and simply zip tied them together so nothing was hanging loose.

You'll notice a black square with 3m double tape on one side. That should be fastened to either the car or the bottom of the headlight. I did it to the bottom, but either way it shouldn't just be hanging down in the open.
Putting the headlight back in, i did have one problem getting it in. It seems the bottom metal fastener is not aligned the same way as the old headlight.

I had to get a pair of scissors (anything long and somewhat pointed will work) and push the metal fastener in its hole as i pushed the headlamp back in. If you don't be careful, that fastener can scratch your car, like it did mine.

That pretty much wraps up the install. You will want to level the headlights as they probably arent the right height (my right one was a good half foot higher than the right). Both mine and m3grady2's were aimed really low from the factory. If you put your car in front of a wall you'll notice one line is higher than the other. There is a screw on the top of the headlight that will adjust the projector up and down. I'm pretty sure there is a diagram in your owner's manual at the correct way to do this, but i just put my car next to my dads and lined it up to his.

Any other questions, feel free to shoot me a PM. I'm sure m3grady2 will be able to help you out with anything as well. My photobucket account is here, there are more pictures there that can help you if you have trouble. I tried resizing these to make it small, so if you need a bigger picture of it to see it better, i'll PM you it.
I'll post other comments/pictures in the next post.
</body>
</html>


 thus i'll have quad halos.


