

Okay guys, this will be my first write up and I do not have pictures of every step, but I'll do my best with what I have so bear with me. I've been getting a lot of questions about this so I figured I should just go ahead and make this thread. I used the Morimoto Retro-quick kit specifically made for Spec-D lights from The Retrofit Source: Retro-Quik: Spec-D Lights There is one for Spyder headlights as well but I can't guarantee that this same process will apply to those.
Here we go![popcorn]
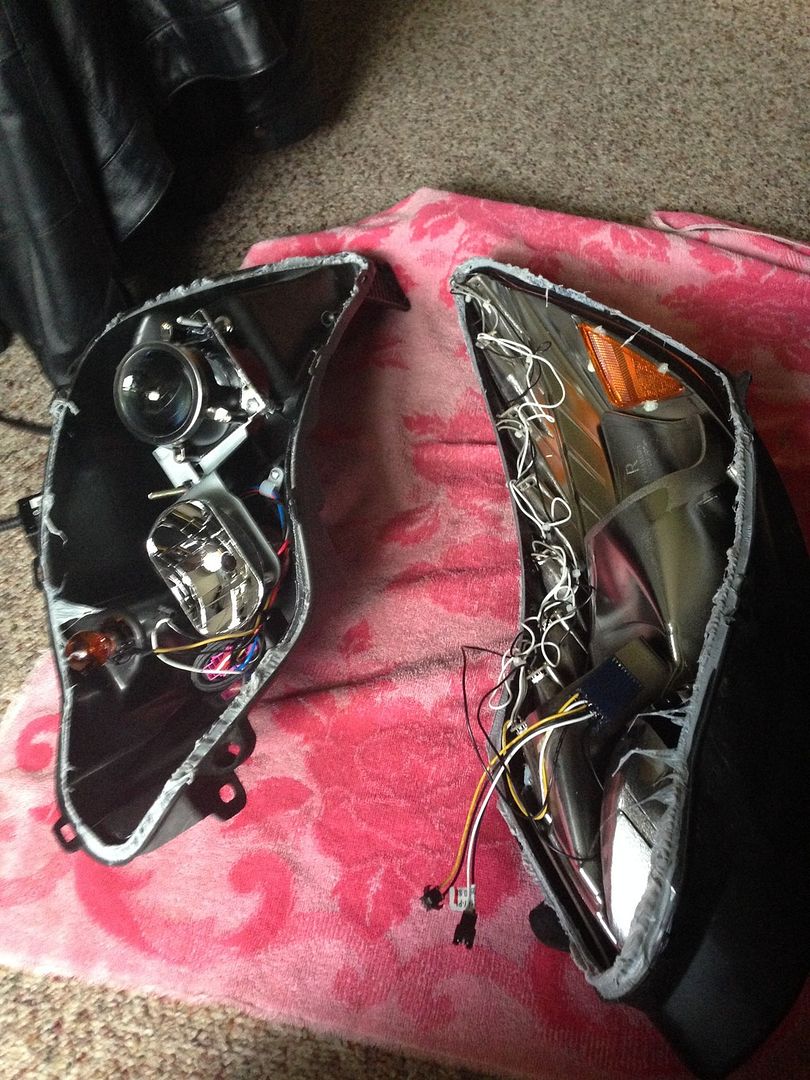
First thing is getting that headlight apart. I was able to easily get them apart by using a hairdryer on its highest setting, but an oven will be much easier (Whichever way you choose, be sure to remove the bulbs first). I just worked at the headlight seam in 4-6" sections, alternating between heating and prying. The headlights are sealed up with butyl sealant, so it wont take much heat. Use a large flathead screwdriver to pry at the seam until it separates, then move along the rest of the headlight, heating and prying a section at a time until you get the light apart. Before you get the headlight completely apart, there are two connectors for the led strip that need to be disconnected. I did not know this and thought I broke one on the first headlight I took apart, so be careful!
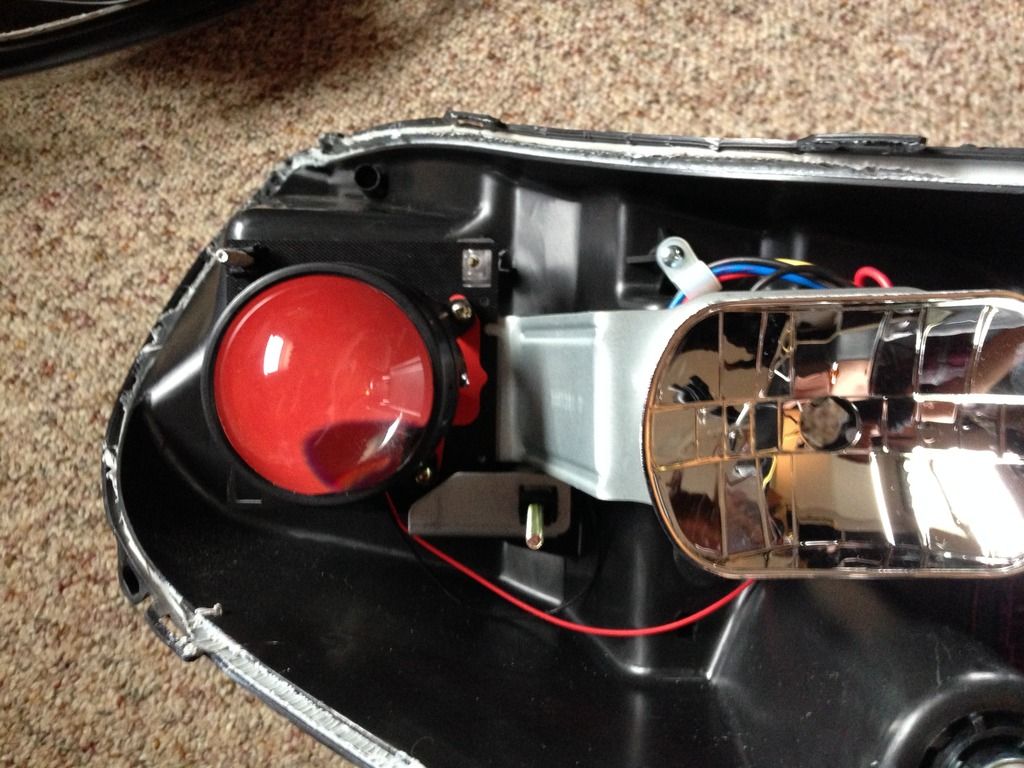
Here's what you'll have once you get the headlight apart.
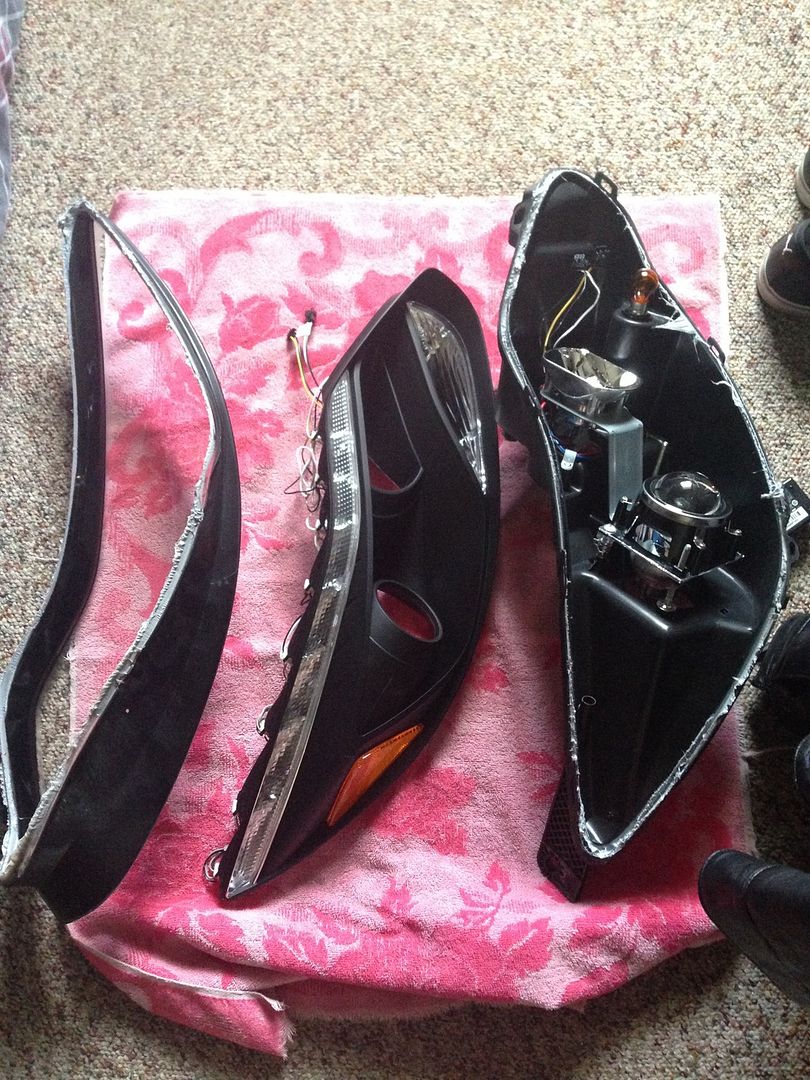
There are three parts to these headlights: the clear outer lens on the left, bezel/led strip in the middle, and the main housing on the right. The outer lens and the bezel are held together by three screws, undo those and the two parts will separate.
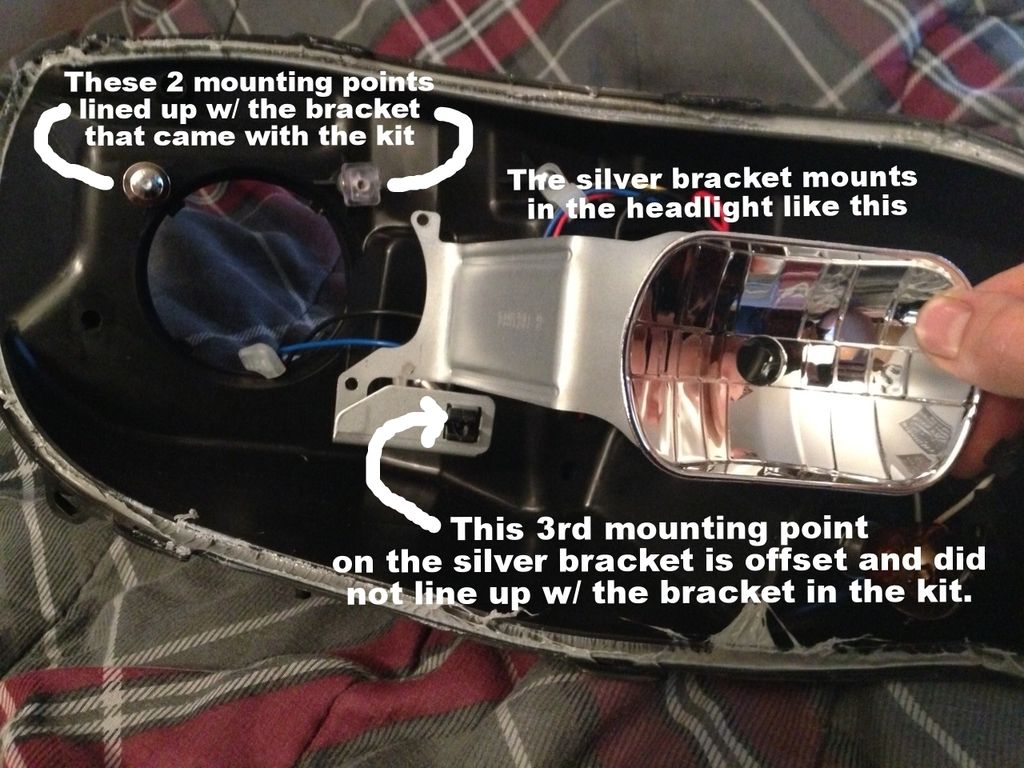
Now you can move on to mounting the projector. You'll see that the stock spec-d projector and the high beam reflector are mounted to a single silver bracket. That bracket will need to be removed. To do that, there are three mounting points: one is fixed, and the other two actually serve as the vertical and horizontal adjustment points. Undo the bolt that's on the fixed mounting point, then move to the back of the headlight and unscrew both of the adjustment points evenly until the bracket comes off. (The threaded adjustment rods should stay in the headlight and not unscrew from the housing)
Once you get the bracket out, flip it over and undo two screws that hold the stock projector to the bracket and remove the projector. (Enjoy your shiny new paperweight! LOL)
Here's where I ran into a problem. Only two of the three mounting points in the headlight lined up with the retro-quick bracket. Here's what I came up with.
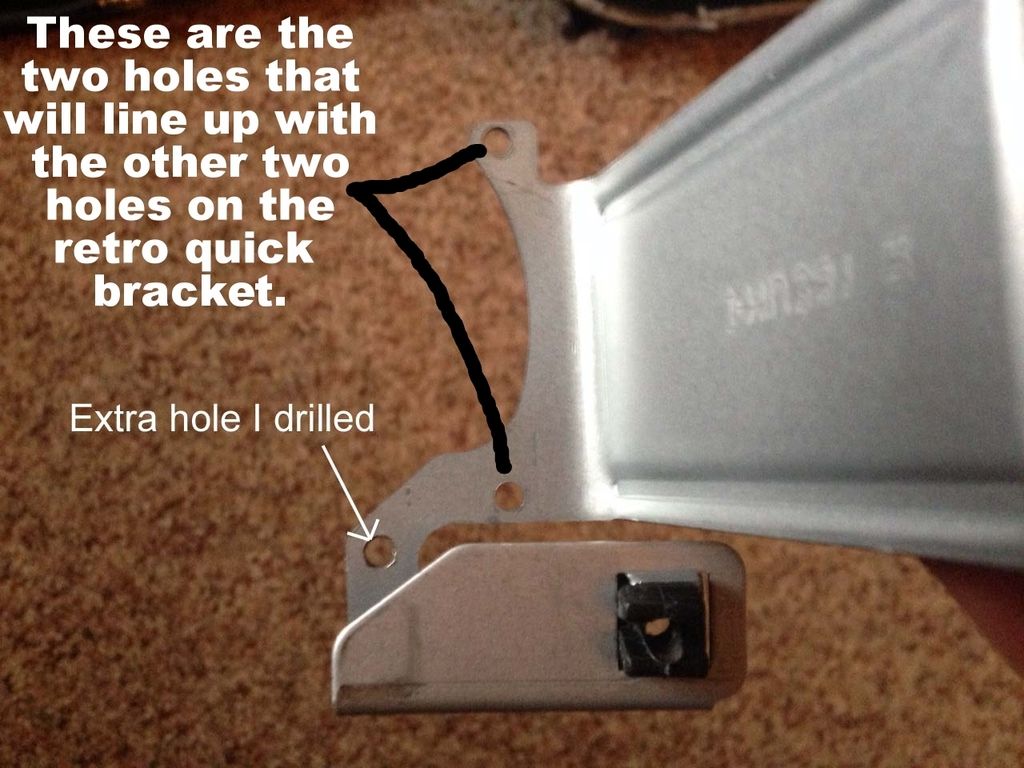
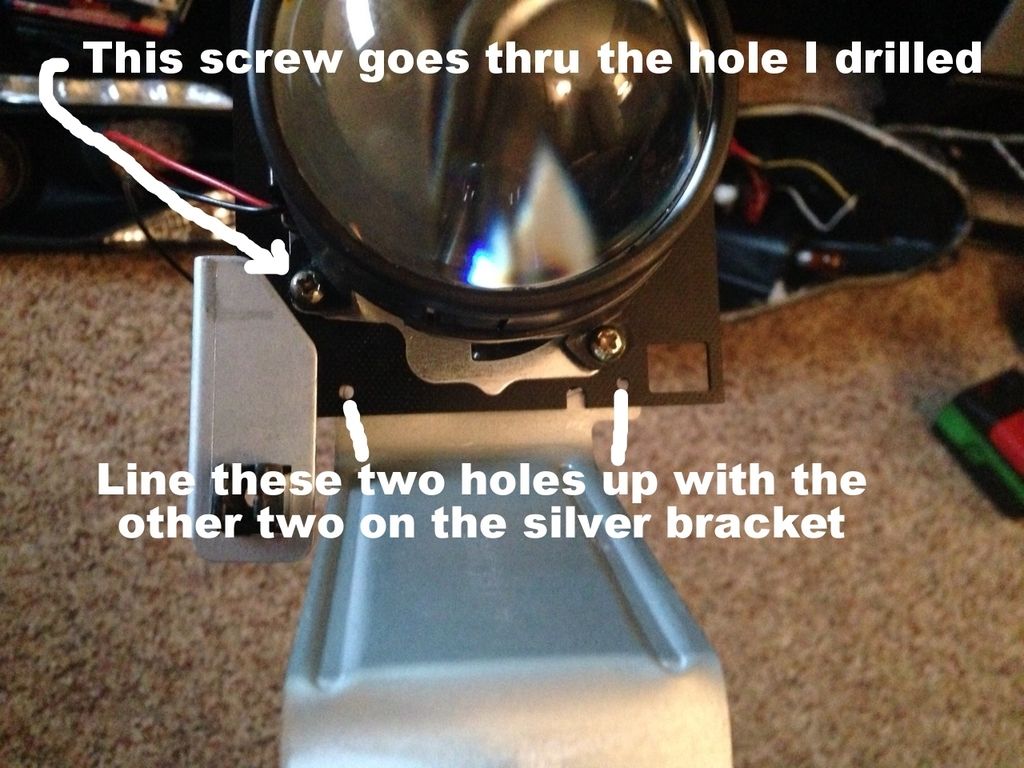
You'll have to drill a hole in the silver bracket so you can mount the mini H1 to the silver bracket using the retro quick bracket. To find where you need to drill the hole, there are two small holes on the edge of the retro quick bracket that will line up with the two holes on the silver bracket where the spec-d projector mounted to. Once you get the holes lined up, you'll use the retro quick bracket as a template to mark and drill your hole. Once you get the hole drilled, you should have something like this:
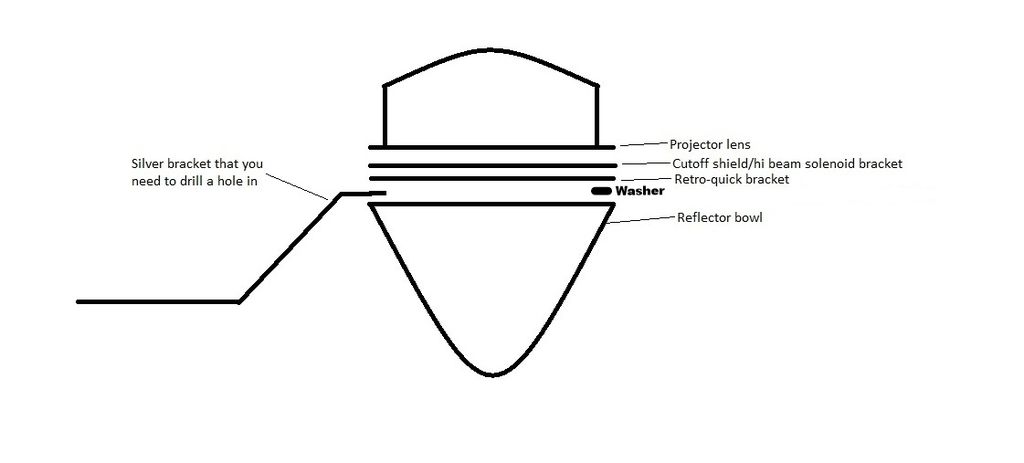
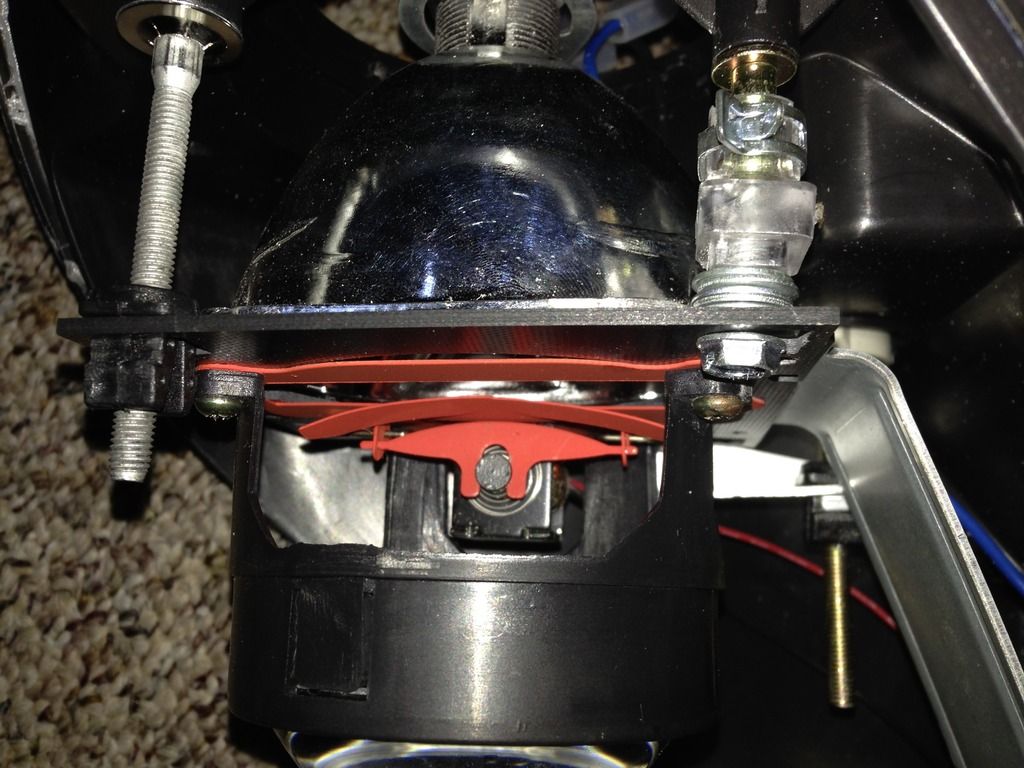
Now you can assemble your mini H1 and get it mounted to the silver bracket. Here's a rough diagram of how to assemble/mount it. NOTE: If you assemble and mount the projector as is, the projector lens will sit crooked due to the extra thickness of the silver bracket. So on the side opposite to the side the silver bracket is mounted to, place a washer between the reflector bowl and retro quick bracket on each of the two bolts on that side to compensate for the extra thickness of the silver bracket.
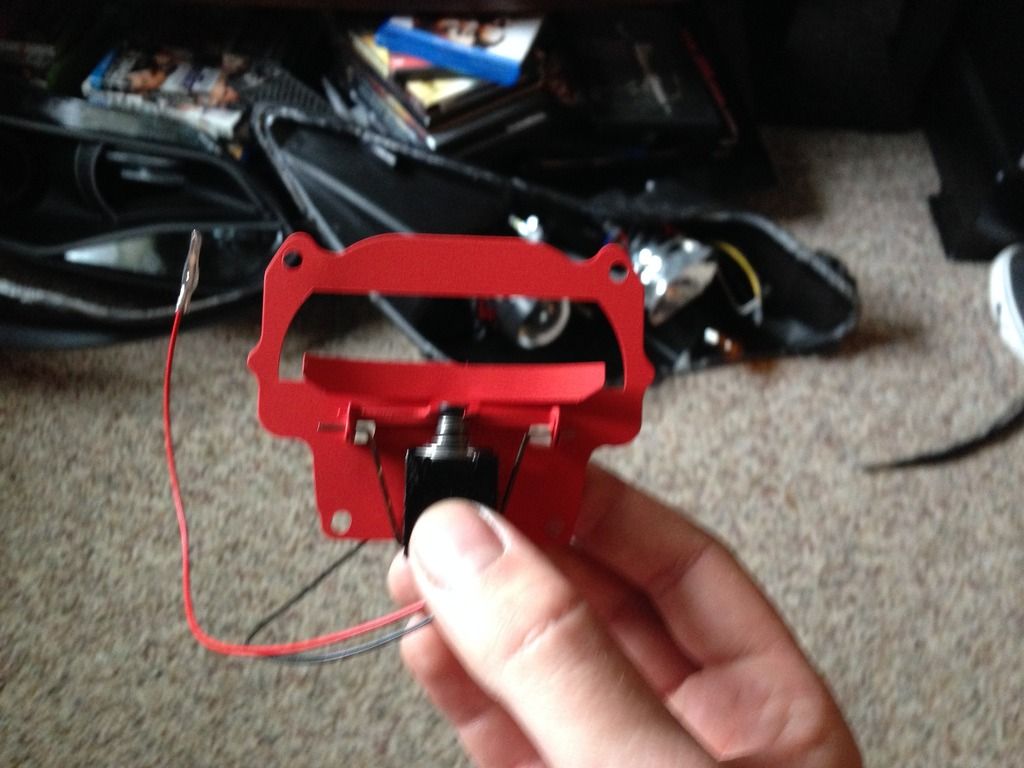
And here is the assembled projector mounted to the silver bracket. The square black bracket is the retro quick bracket that's supplied in the kit. I also pointed out the two holes on the retro quick bracket that will line up with the holes on the silver bracket. (The other bolt on the right may look like it will line up with one of those holes on the bracket, but it doesn't).
Next, there's a little black plastic piece on the spec-d projector that you need to swap over to the retro-quick bracket. Look back at the pic that shows the extra hole I drilled, it looks exactly like the one mounted on the silver bracket. Just get some needle nose pliers and pinch the tapered side of it and it will come out. For the right headlight, it will need to be mounted to the top left square of the retro quick bracket, and the top right square for the left headlight. It should just press right in.
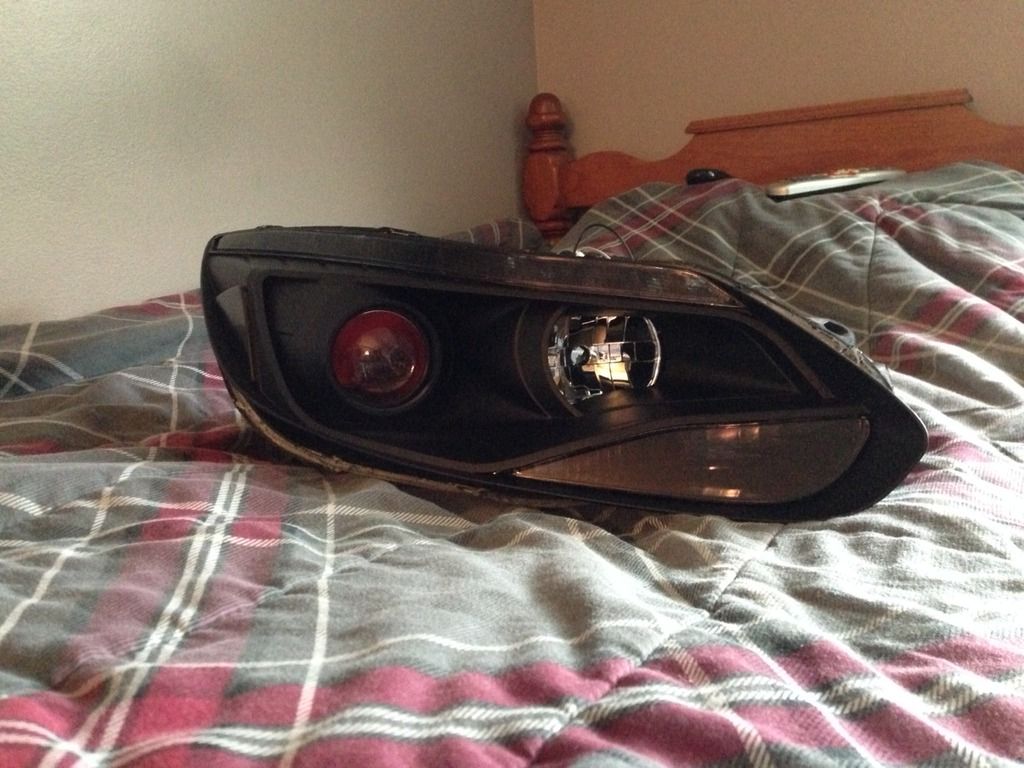
Now that the mini H1 is mounted to the silver bracket, all of the mounting points will line up with the ones in the headlight and everything can now be mounted to the headlight. Now's the part where you can have some fun and customize the headlights to your liking. I just decided to black out the turn signal, reflector lens, and led strip with VHT niteshades. I also painted the cutoff shield and high beam solenoid bracket with red high temp paint to get whats called a "passive demon eye".
Gave myself a rough idea of what they're gonna look like
Here's everything all mounted up roughly. You'll need to run a self tapping screw into the clear plastic part of the fixed mounting point (top right mounting point), but not now, I'll explain later.
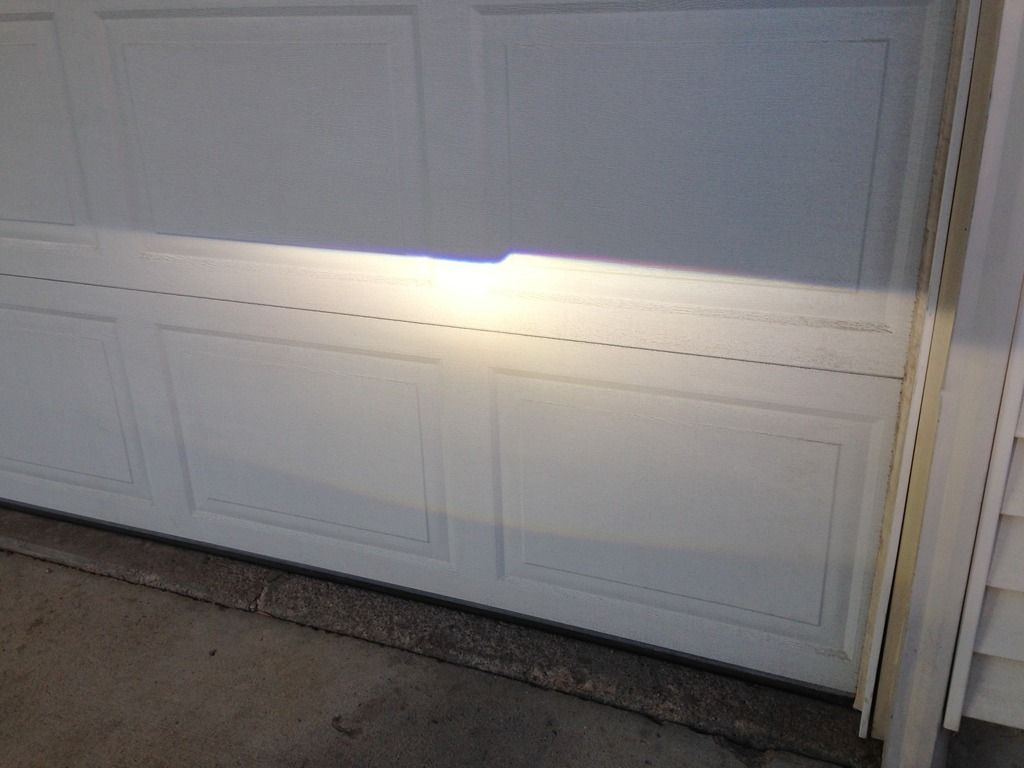
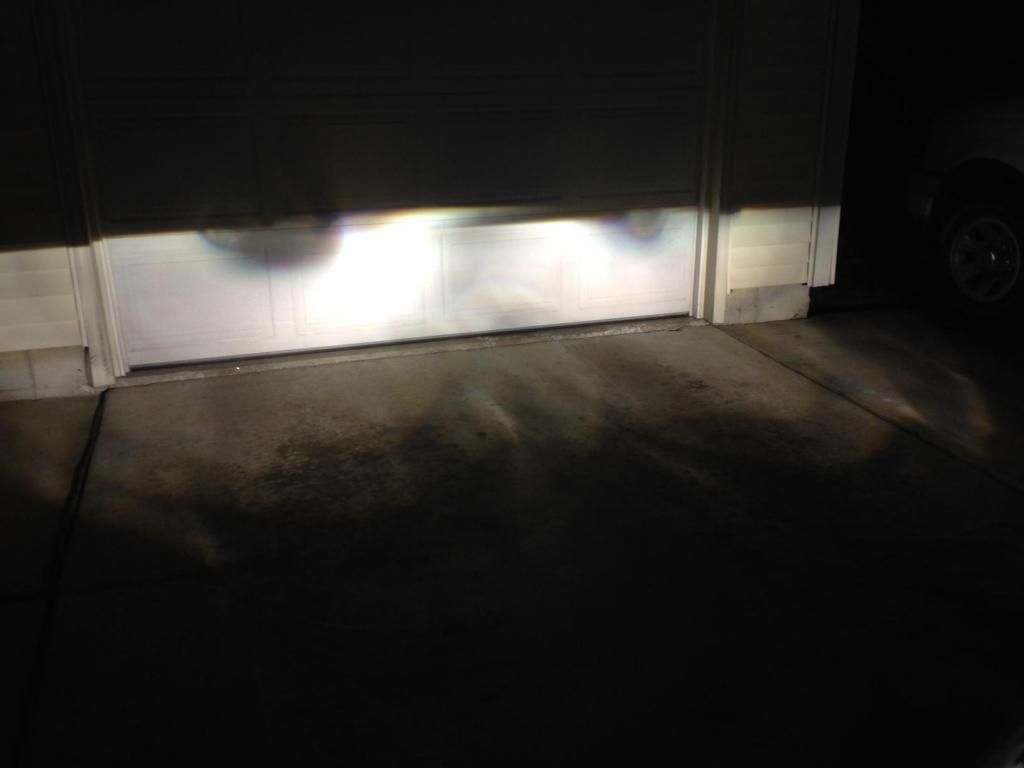
At this point, you can wire up the high beam solenoid. The solenoid wires are red for positive, and black for negative. The high beam wires in the headlight you'll need to tap into are also red and black. Just connect red to red and black to black and you'll be all set. After the solenoid is wired you're ready to mount the headlight in the car and check for proper alignment of the projector and the operation of the high beam solenoid. Here's my projector cutoff during my test fit. I was surprised at how level it was! I did not need to make any adjustments to level either one of my projectors and don't really see a reason why you should either. Mine may be a little crooked, but not enough to really bother me presonally.
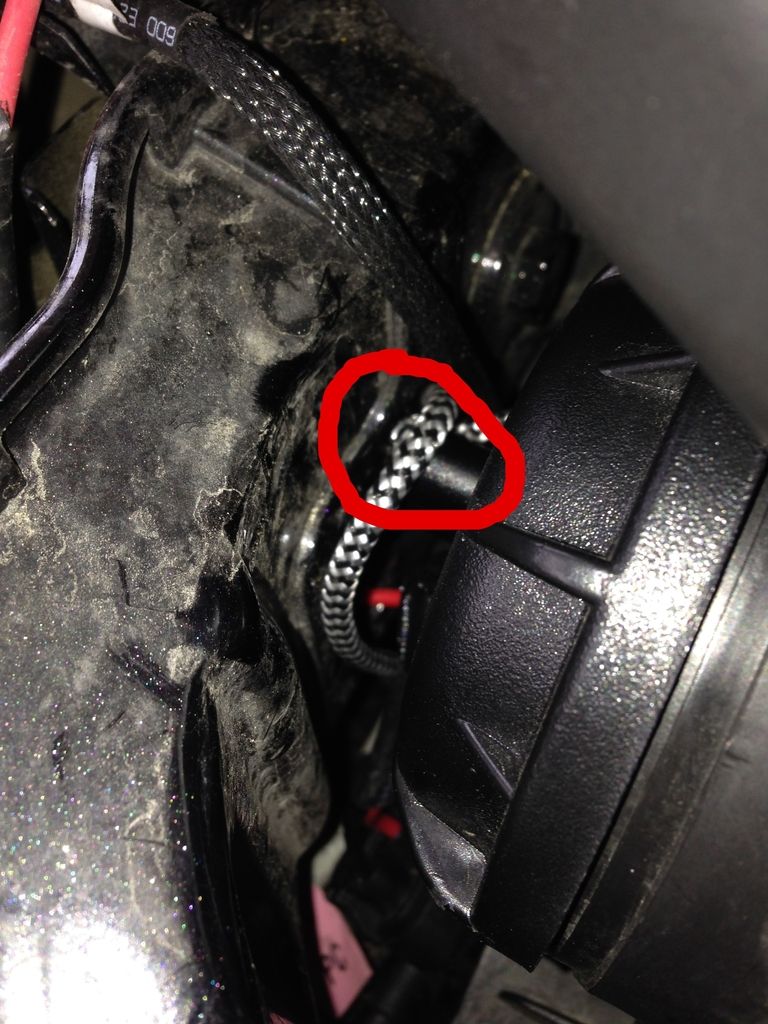
Now here's a second problem I ran into. The mini H1 is roughly 1/2" to 5/8" longer than the original spec-d projector. So when I was doing my test fit, the back of the connector for the HID bulb was hitting the upper radiator core support. But luckily, the solution was simple. Remember those two adjustment points? Unscrew them (counterclockwise) evenly. This will move the projector forward in the headlight assembly, making more room in the back for the connector for the HID bulb. Just keep unscrewing them and test fitting until you get enough room back there for the HID bulb connector. Here's a pic of how much room there was before, the bulb connector is hard to see, so i circled it in red.
After you make all of these adjustments, you can finish mounting the projector in the headlight. Here's is where you'll install that self tapping screw I mentioned earlier. The pic below shows the fixed mounting point on the right with some washers and the self tapper installed. I used the washers as spacers to make up for the projector being moved forward. Once you figure out how many washers to use, screw the self tapper into the clear plastic part of the mounting point and your projector and high beam reflector will be fully mounted. I think I ended up using about 5-6 washers on each headlight and a 1/2" long self tapper.
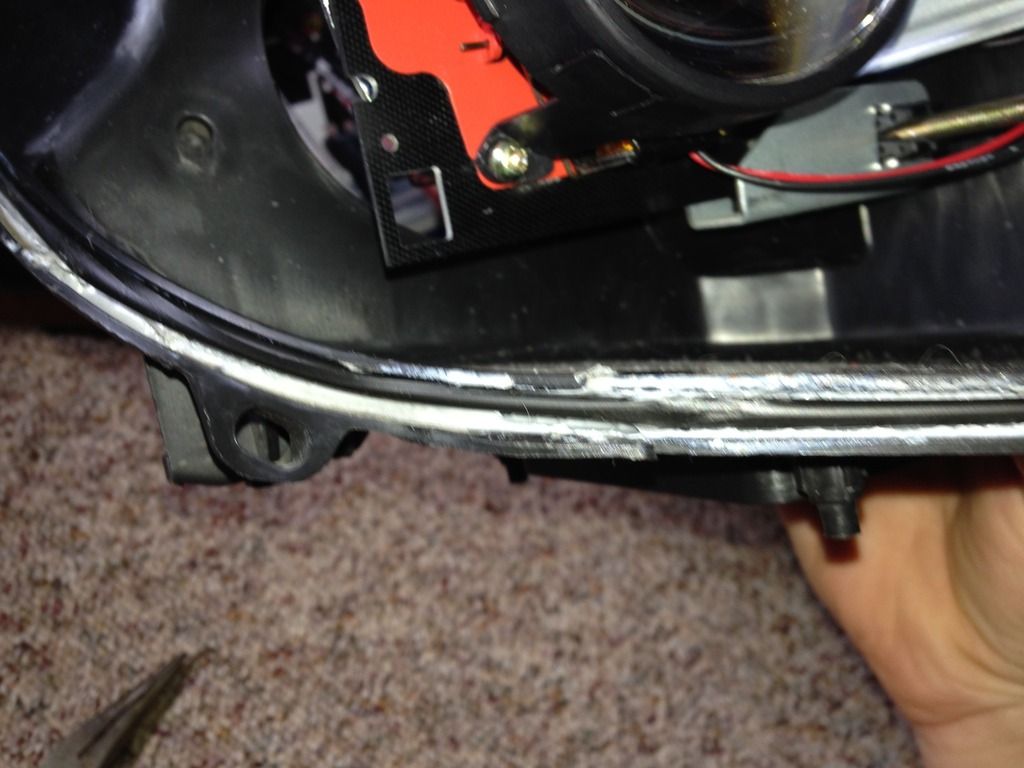
Almost done! Now that everything's lined up and mounted, the headlight is ready to be sealed back up. First, install the bezel/led strip housing back onto the the headlight lens with the three screws. Then clean out the channel on the main headlight housing of all the old butyl sealant the best you can. (You can re-use it, but to be safe I ordered some more along with the retro quick kit. Morimoto RetroRubber Butyl Glue Sealant). When I got the old stuff cleaned out I got some of the new butyl and stretched it until it was thin enough to fit inside the channel and pressed it in with my fingers (see pic below).
Now the two halves of the headlight can be pressed back together, but don't forget to re-connect those two connectors for the led strip first. To seal them back up I went with the hair dryer method again. I started out by getting the two halves lined up and pressing the headlight back together by hand with no heat. To finish the sealing process I went around the seam of the headlight with the hairdryer, again working in small sections. Heat up the butyl for about 10-15 seconds (hairdryer was on high), then use pliers to squeeze together the headlight to get it fully seated. Work your way around the entire headlight and then you're done! Put back in any bulbs you took out and re-install the headlights back on your car, turn them on, then do any final alignment tweaks if needed.
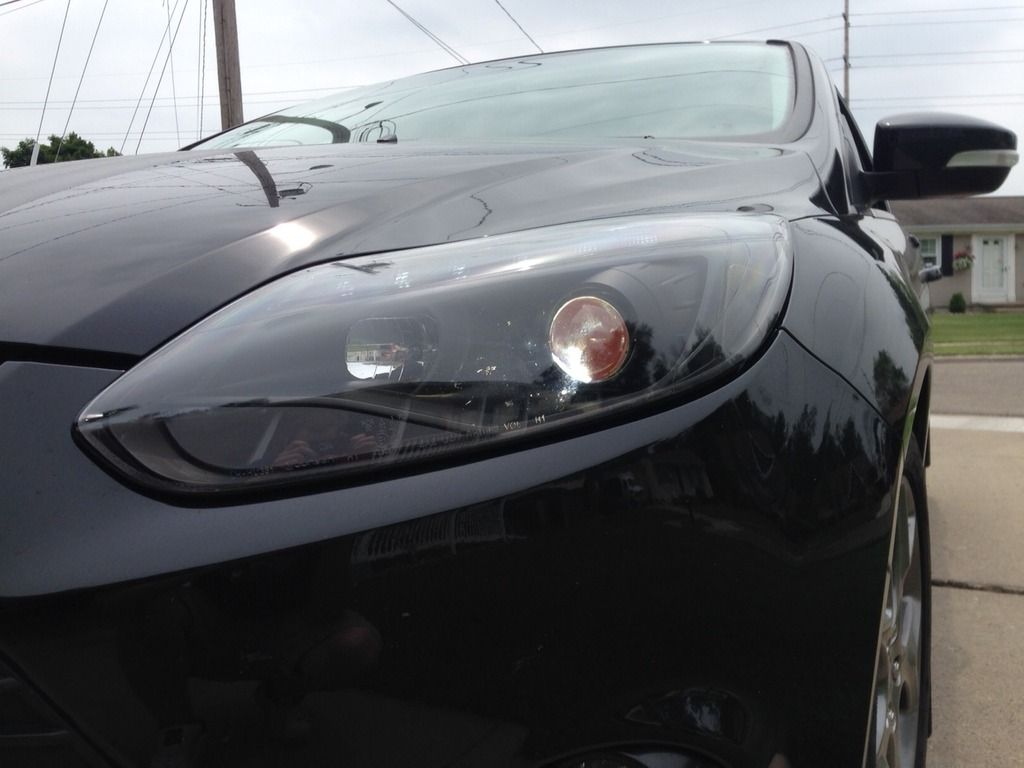
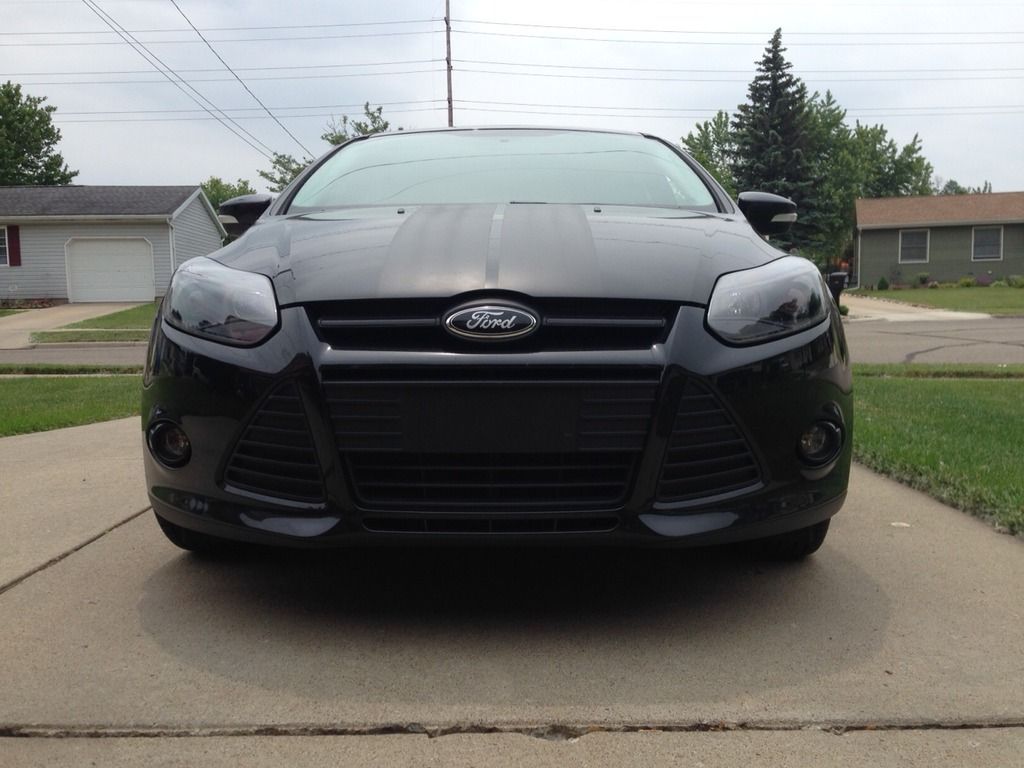
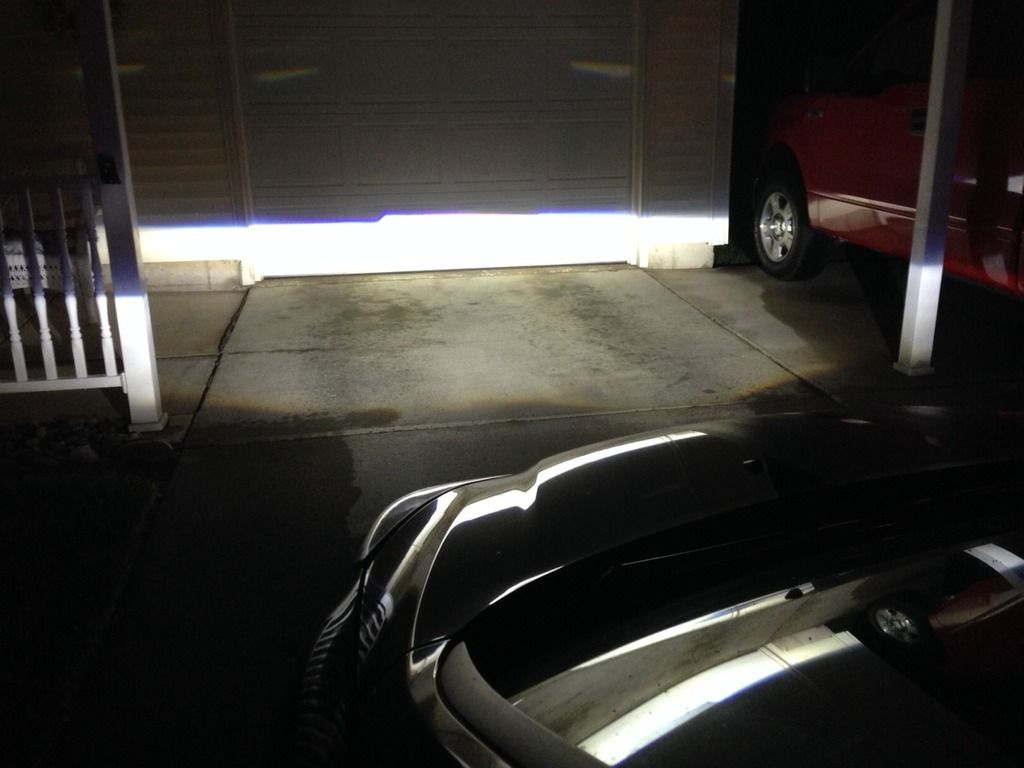
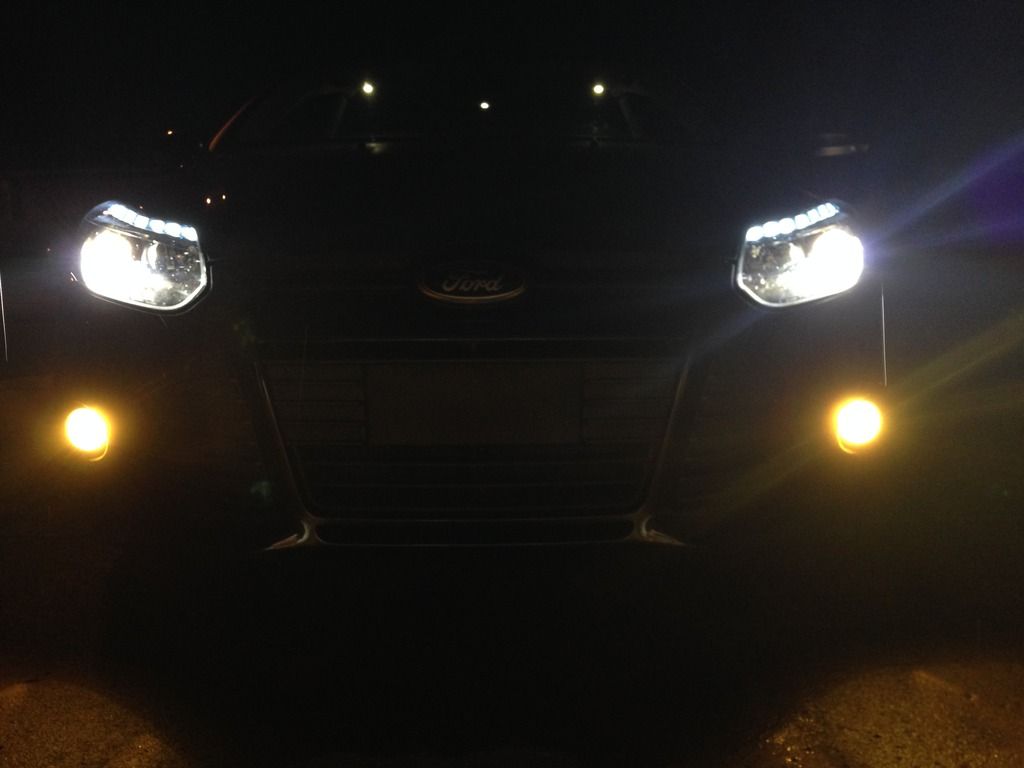
Now you can step back and bask in the glory of your awesome new headlights! Here's the final out come of mine:
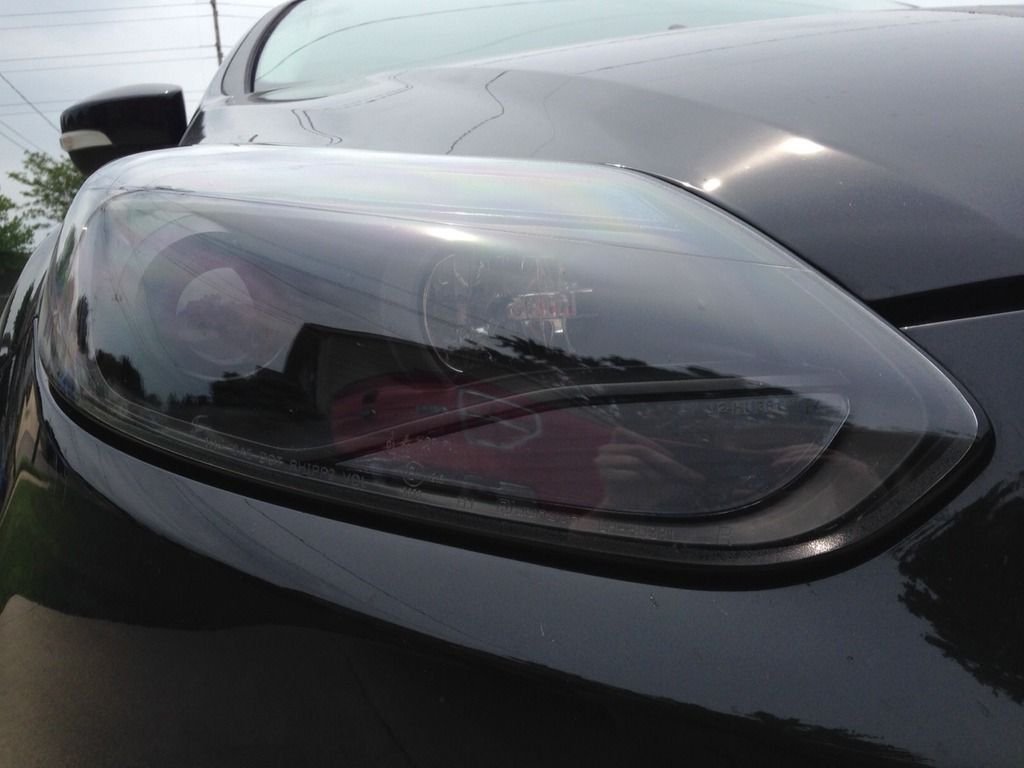
Before with HID's in the stock spec-d projectors
Now for some side notes:
-The bolt holes on the retro quick bracket that came in the kit did not line up with the bolt holes on the mini h1 projector. So I had to use a dremel to take care of this issue. (I suspect I may have been sent a flawed bracket, so you may not have this problem)
-I was able to re-use the housing caps (the caps that twist off the back of the headlight to gain access to the bulb), but the rubber grommet that I installed when I originally installed my HID's had to be removed. The Retrofit Source does sell rubber end caps: Rubber Housing Caps - Accessories. Based off my measurements you'll need the 80mm ones if you decide to get them.
-I did have to take apart and re-seal my passenger's side headlight due to condensation. So I'm not guaranteeing that you'll get your lights perfectly sealed the first time. My driver's side one has been perfectly fine, even with the rubber grommet on the housing cap missing.
-Again, I wasn't really planning on doing this write up so I did not have pictures of every step. I wrote this using the pictures I had and really took my time on this to explain everything the best I could. If there's anything you need me to clear up just let me know!
Here we go![popcorn]
First thing is getting that headlight apart. I was able to easily get them apart by using a hairdryer on its highest setting, but an oven will be much easier (Whichever way you choose, be sure to remove the bulbs first). I just worked at the headlight seam in 4-6" sections, alternating between heating and prying. The headlights are sealed up with butyl sealant, so it wont take much heat. Use a large flathead screwdriver to pry at the seam until it separates, then move along the rest of the headlight, heating and prying a section at a time until you get the light apart. Before you get the headlight completely apart, there are two connectors for the led strip that need to be disconnected. I did not know this and thought I broke one on the first headlight I took apart, so be careful!
Here's what you'll have once you get the headlight apart.

There are three parts to these headlights: the clear outer lens on the left, bezel/led strip in the middle, and the main housing on the right. The outer lens and the bezel are held together by three screws, undo those and the two parts will separate.

Now you can move on to mounting the projector. You'll see that the stock spec-d projector and the high beam reflector are mounted to a single silver bracket. That bracket will need to be removed. To do that, there are three mounting points: one is fixed, and the other two actually serve as the vertical and horizontal adjustment points. Undo the bolt that's on the fixed mounting point, then move to the back of the headlight and unscrew both of the adjustment points evenly until the bracket comes off. (The threaded adjustment rods should stay in the headlight and not unscrew from the housing)
Once you get the bracket out, flip it over and undo two screws that hold the stock projector to the bracket and remove the projector. (Enjoy your shiny new paperweight! LOL)
Here's where I ran into a problem. Only two of the three mounting points in the headlight lined up with the retro-quick bracket. Here's what I came up with.

You'll have to drill a hole in the silver bracket so you can mount the mini H1 to the silver bracket using the retro quick bracket. To find where you need to drill the hole, there are two small holes on the edge of the retro quick bracket that will line up with the two holes on the silver bracket where the spec-d projector mounted to. Once you get the holes lined up, you'll use the retro quick bracket as a template to mark and drill your hole. Once you get the hole drilled, you should have something like this:

Now you can assemble your mini H1 and get it mounted to the silver bracket. Here's a rough diagram of how to assemble/mount it. NOTE: If you assemble and mount the projector as is, the projector lens will sit crooked due to the extra thickness of the silver bracket. So on the side opposite to the side the silver bracket is mounted to, place a washer between the reflector bowl and retro quick bracket on each of the two bolts on that side to compensate for the extra thickness of the silver bracket.

And here is the assembled projector mounted to the silver bracket. The square black bracket is the retro quick bracket that's supplied in the kit. I also pointed out the two holes on the retro quick bracket that will line up with the holes on the silver bracket. (The other bolt on the right may look like it will line up with one of those holes on the bracket, but it doesn't).

Next, there's a little black plastic piece on the spec-d projector that you need to swap over to the retro-quick bracket. Look back at the pic that shows the extra hole I drilled, it looks exactly like the one mounted on the silver bracket. Just get some needle nose pliers and pinch the tapered side of it and it will come out. For the right headlight, it will need to be mounted to the top left square of the retro quick bracket, and the top right square for the left headlight. It should just press right in.
Now that the mini H1 is mounted to the silver bracket, all of the mounting points will line up with the ones in the headlight and everything can now be mounted to the headlight. Now's the part where you can have some fun and customize the headlights to your liking. I just decided to black out the turn signal, reflector lens, and led strip with VHT niteshades. I also painted the cutoff shield and high beam solenoid bracket with red high temp paint to get whats called a "passive demon eye".

Gave myself a rough idea of what they're gonna look like

Here's everything all mounted up roughly. You'll need to run a self tapping screw into the clear plastic part of the fixed mounting point (top right mounting point), but not now, I'll explain later.

At this point, you can wire up the high beam solenoid. The solenoid wires are red for positive, and black for negative. The high beam wires in the headlight you'll need to tap into are also red and black. Just connect red to red and black to black and you'll be all set. After the solenoid is wired you're ready to mount the headlight in the car and check for proper alignment of the projector and the operation of the high beam solenoid. Here's my projector cutoff during my test fit. I was surprised at how level it was! I did not need to make any adjustments to level either one of my projectors and don't really see a reason why you should either. Mine may be a little crooked, but not enough to really bother me presonally.

Now here's a second problem I ran into. The mini H1 is roughly 1/2" to 5/8" longer than the original spec-d projector. So when I was doing my test fit, the back of the connector for the HID bulb was hitting the upper radiator core support. But luckily, the solution was simple. Remember those two adjustment points? Unscrew them (counterclockwise) evenly. This will move the projector forward in the headlight assembly, making more room in the back for the connector for the HID bulb. Just keep unscrewing them and test fitting until you get enough room back there for the HID bulb connector. Here's a pic of how much room there was before, the bulb connector is hard to see, so i circled it in red.

After you make all of these adjustments, you can finish mounting the projector in the headlight. Here's is where you'll install that self tapping screw I mentioned earlier. The pic below shows the fixed mounting point on the right with some washers and the self tapper installed. I used the washers as spacers to make up for the projector being moved forward. Once you figure out how many washers to use, screw the self tapper into the clear plastic part of the mounting point and your projector and high beam reflector will be fully mounted. I think I ended up using about 5-6 washers on each headlight and a 1/2" long self tapper.

Almost done! Now that everything's lined up and mounted, the headlight is ready to be sealed back up. First, install the bezel/led strip housing back onto the the headlight lens with the three screws. Then clean out the channel on the main headlight housing of all the old butyl sealant the best you can. (You can re-use it, but to be safe I ordered some more along with the retro quick kit. Morimoto RetroRubber Butyl Glue Sealant). When I got the old stuff cleaned out I got some of the new butyl and stretched it until it was thin enough to fit inside the channel and pressed it in with my fingers (see pic below).

Now the two halves of the headlight can be pressed back together, but don't forget to re-connect those two connectors for the led strip first. To seal them back up I went with the hair dryer method again. I started out by getting the two halves lined up and pressing the headlight back together by hand with no heat. To finish the sealing process I went around the seam of the headlight with the hairdryer, again working in small sections. Heat up the butyl for about 10-15 seconds (hairdryer was on high), then use pliers to squeeze together the headlight to get it fully seated. Work your way around the entire headlight and then you're done! Put back in any bulbs you took out and re-install the headlights back on your car, turn them on, then do any final alignment tweaks if needed.
Now you can step back and bask in the glory of your awesome new headlights! Here's the final out come of mine:


Before with HID's in the stock spec-d projectors

Now for some side notes:
-The bolt holes on the retro quick bracket that came in the kit did not line up with the bolt holes on the mini h1 projector. So I had to use a dremel to take care of this issue. (I suspect I may have been sent a flawed bracket, so you may not have this problem)
-I was able to re-use the housing caps (the caps that twist off the back of the headlight to gain access to the bulb), but the rubber grommet that I installed when I originally installed my HID's had to be removed. The Retrofit Source does sell rubber end caps: Rubber Housing Caps - Accessories. Based off my measurements you'll need the 80mm ones if you decide to get them.
-I did have to take apart and re-seal my passenger's side headlight due to condensation. So I'm not guaranteeing that you'll get your lights perfectly sealed the first time. My driver's side one has been perfectly fine, even with the rubber grommet on the housing cap missing.
-Again, I wasn't really planning on doing this write up so I did not have pictures of every step. I wrote this using the pictures I had and really took my time on this to explain everything the best I could. If there's anything you need me to clear up just let me know!


