Focus Fanatics Forum banner
21 - 33 of 33 Posts
No it shouldn't. But I am going to measure it to be safe. Copper is copper is copper. The main difference is going to be flexibility.
That is not exactly true. It is alloyed differently for different applications. The welding tips that go on the spot weld guns here at Ford are a special copper to deal with the high heat. We also have copper stock made from the same alloyed copper for making plates that are used in welding bodies as well.

My ASM manual lists about 32 different copper alloys before going into even more that are alloyed with beryllium, which would not be used by the general public. Then there is probably another 60 after that.


Steve
 
Discussion starter · #24 ·
That is not exactly true. It is alloyed differently for different applications. The welding tips that go on the spot weld guns here at Ford are a special copper to deal with the high heat. We also have copper stock made from the same alloyed copper for making plates that are used in welding bodies as well.

My ASM manual lists about 32 different copper alloys before going into even more that are alloyed with beryllium, which would not be used by the general public. Then there is probably another 60 after that.


Steve
This is true BUT the difference as compared to something like some bullisht CCA is the amount of copper per foot is has a nominal price. It has some great weight and also surprisingly flexible.
 
Discussion starter · #25 ·
Here's the latest.

The 1/0 and 4 AWG wire


Wiring Install:

I started by removing the Glove Box, the center console panel on passenger side, all the trim on the passenger side to get under the carpet, and the rear passenger seat. I suggest taking out the front seat as well but I couldn't find my T50 Star head. Would have made this sooo much easier.

To remove the glove box from an MK3 Focus there are a total of 5 Star Head screws that need to be removed.
Two inside on the upper lip.

Two underneath the glovebox near the back. These are BLACK screws. You may see some silver 8mm bolts those are NOT them.


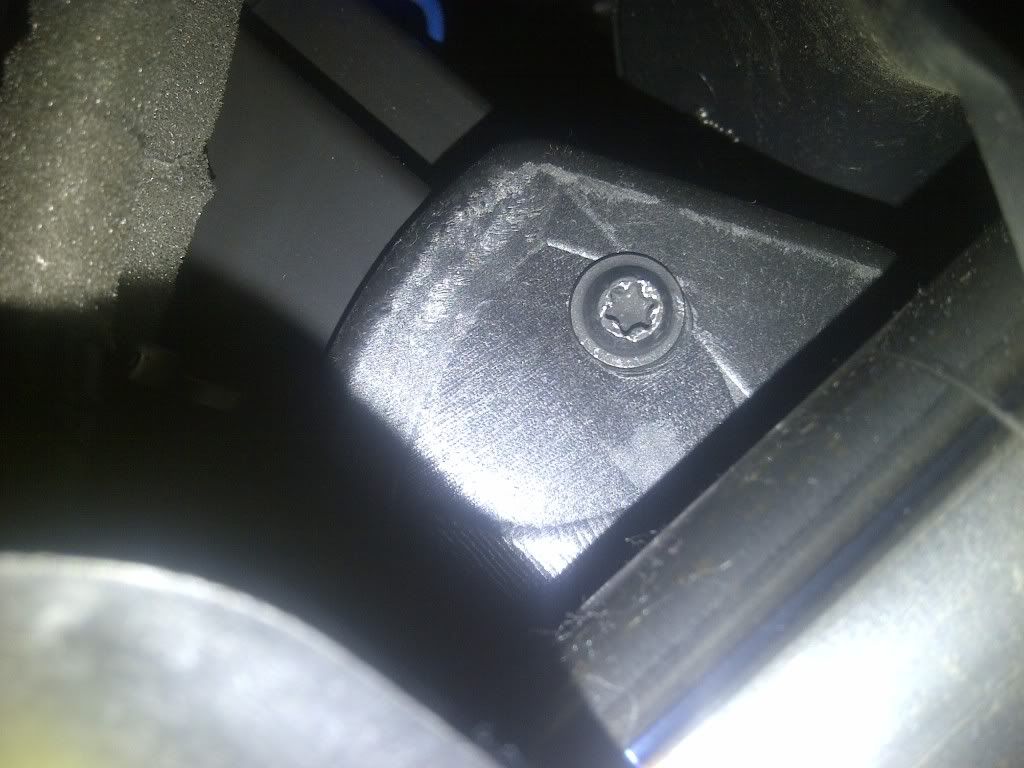
Then the last screw is hidden. It is behind the panel that the door closes up against.
Here is the panel. It takes some force to pop out but it will.


Once you get it out there will be a lot of room to work.

This is the grommet we are trying to get to. It has lots of spare space for cutting adding.

Same grommet in the engine bay.

It's not the easiest thing to reach in the engine bay but this is the razor I used to get to it.

"X" marks the spot.

Wiring is in. Also added a 10 AWG wire for the LCQ-1.


Here are some shots of the trim pieces I removed.
Piece next to rear seat.


Piece running the edge of the floor under front door.


Front piece that goes from floor to glove box area.


This is the piece that separates the front and rear doors.


So far I've run speaker wire, power wire, and my interconnects from front to back. Make sure you keep the cable types away from each other. If you get the power wire running parallel to the interconnects may end up to engine noise and no one wants that.
Also be weary of random screws sticking up that may cut into your wiring.

I decided to install the LCQ-1 in the glove box. Going to have to do some minor modification of the box so that it will fit.

All that was yesterday, lets see what I can get done today.
 
Discussion starter · #27 ·
Box is completed minus fabric!
I've ran into a few nightmares with the car...
No matter how hard headed don't let anyone convince you to remove a door from the vehicle to make things easier. "It's no problem. It'll be easy to connect it back" [slap] Results: Pay the body shop to get the door to hang correctly. Have to reprint the bolts in the hinge from tool marks. And also the external thermometer may read -40 for a day or two until it resets. Also you'll have to figure out the one touch window reset because after the door is disconnected none of the windows one touch feature will work. To fix this roll windows all the way down and continue holding switch for 3 secs after down then after up. One window at a time and you're golden.
Lastly no idea why but the wires from the two factory tweeters changes color about half a foot into the car or do a magical disappearing trick. So I pulled the signal for the highs from the tweeter wires right before they exit the car and enter the molex connector towards the door. Not a fun place to get to...

As of now I have ran the cables to the lcq-1 and installed it into the glovebox. When tested it didn't turn on. I connected a remote wire and it powered up no problem! I thought it was supposed to automatically sense the signal from the speaker wires and power up but guess not. I have to find a good wire to splice for the remote wire.

Pictures coming.

Next up...
Get body shop to adjust the door hang.
Fabric on the box and amplifier back board.
Install sub in box.
Install amps and place the board on either back of seat or the ceiling of the trunk out of view.
Disassemble door panels and install the component set.
Tune and set gains.
ROCK THE EFFF OUT!
 
As of now I have ran the cables to the lcq-1 and installed it into the glovebox. When tested it didn't turn on. I connected a remote wire and it powered up no problem! I thought it was supposed to automatically sense the signal from the speaker wires and power up but guess not. I have to find a good wire to splice for the remote wire.
Interesting - I'm running an LC7i in my 2013 SE with 6 speaker stereo and it turns on automatically. I ran the remote wire but ended up not needing it because it powers on/off satisfactorily on its own.
 
Discussion starter · #29 ·
Interesting - I'm running an LC7i in my 2013 SE with 6 speaker stereo and it turns on automatically. I ran the remote wire but ended up not needing it because it powers on/off satisfactorily on its own.
Exactly! I even checked the GTO jumper to ensure that it wasn't on the wrong setting. I'm going to call audio control later today. I'll let you know what they say.
 
My 6i put out around 9v on the turn on. I used that to turn on a relay to power up amps. A few of may amps powered on with 9v but not my US Amp.
 
Discussion starter · #31 ·
Just got off the phone with AC and he told me that unit is most likely not receiving enough voltage as Metalcrack is referring too.
Therefor I will be setting the GTO jumper to DEFEAT and running a remote wire to the unit. Anybody be able to easily point me in the direction of a splice source for it?! Preferably not the antenna wire. I would prefer one on the passengers side of center console.
 
I used the 9v to turn on a relay to switch 12 volts. Shouldn't of had to but worked. I'm out of the country so I don't have access to the fuse diagram. I'm sure someone can tell you where to add-a-fuse.
 
Just got off the phone with AC and he told me that unit is most likely not receiving enough voltage as Metalcrack is referring too.
It sounds like Metalcrack is saying that the LC6i's own 12V output (used so that the LC6i can power up your amps) only put out 9V. That would only affect the LC6i's ability to turn on other amps, it doesn't affect the LC6i's auto-power-on via speaker levels (GTO).

Any reason you don't want the antenna wire? Here's my messy build

Image


Image


Image


Image
 
21 - 33 of 33 Posts