

Here is how i decided to do it and more importantly how i was able to make a door to cover the hole afterwards.
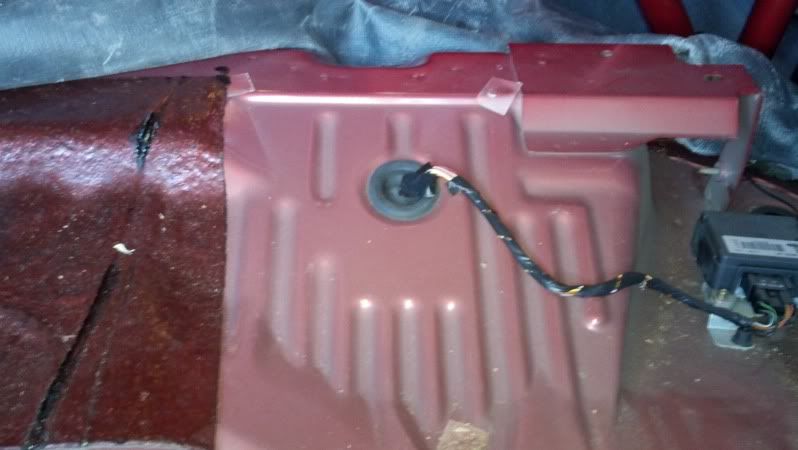
This is what the area looks like. It is located under the passenger side of the rear seat.
![Image]()
Area marked off to be removed.
![Image]()
![Image]()
![Image]()
For cutting i used a Dremel and their reinforced cutting wheels. Only used 1 1/2 wheels to cut the panel out, just have to go slow. I just marked my lines then went over them slowly working through the metal. In the above pics you can see i already started cutting the one side.
Here is the piece once all cuts are made.
![Image]()
Take notice to the slit cut from the harness hole to the side. This allows the harness to be removed from the panel you cut. Had to do this because you won't be able to reach all the connectors to pull the harness through the hole.
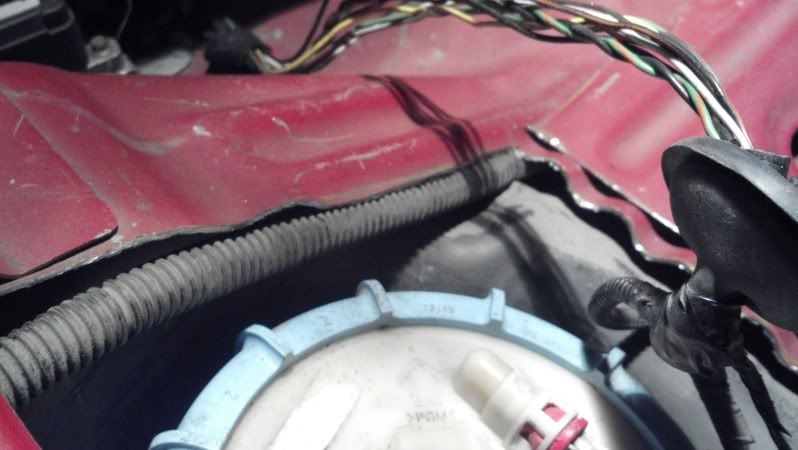
Take note to this evap line which was not snapped into the groove on top of the tank were it suppossed to be. i knicked this and put a small hole in it that i patched with some rtv sealant.
Not in the groove.
![Image]()
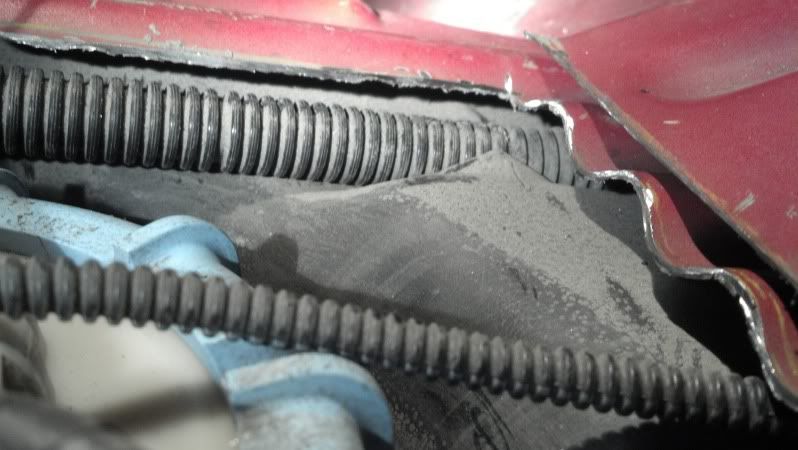
In the groove after i snapped it back in there.
![Image]()
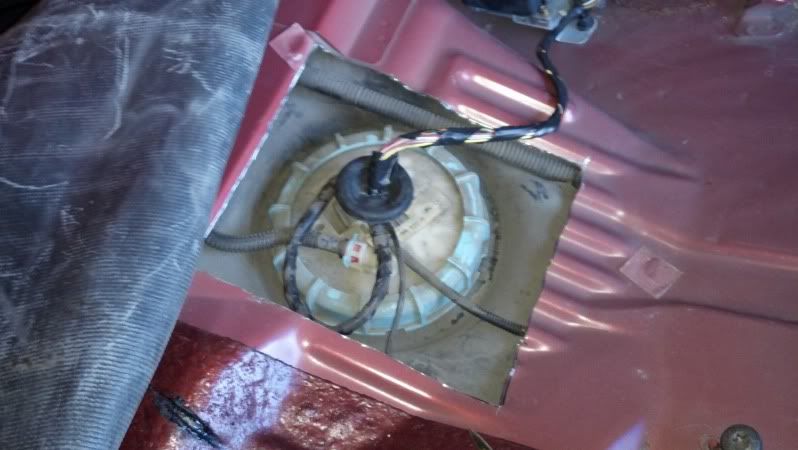
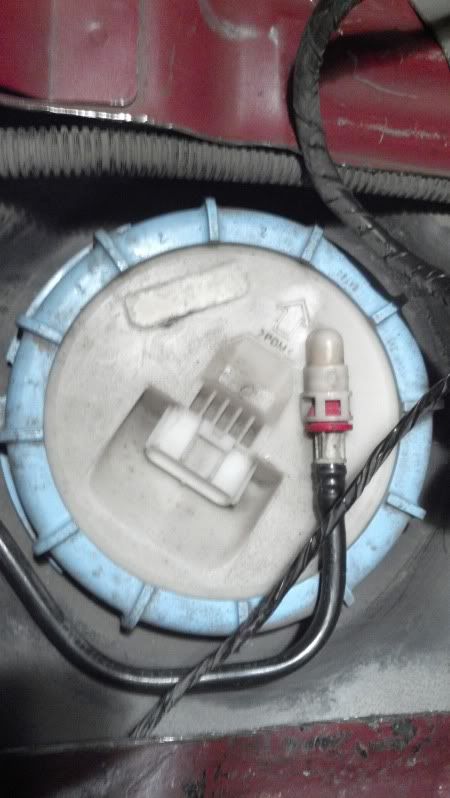
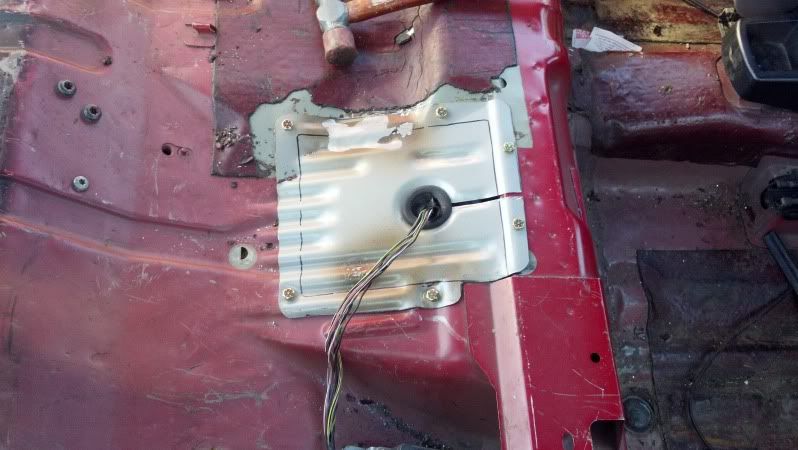
Here is the hole itself and as you can see the fuel pump module that you now have easy access to.
![Image]()
![Image]()
Now you will need to clean all of the dirt and grime off of the whole area before opening it up. Don't want to get any of this into the tank. For this i used a nylon brush and shop vac.
![Image]()
![Image]()
Now to make a door i went to a local salvage yard and cut out the floor pan area above the fuel tank. I cut it over sized so that i would be able to trim it to fit.
![Image]()
There is some under coating/sound deadner on the underside that will need to be removed. I just used a propane torch and burnt it off.
![Image]()
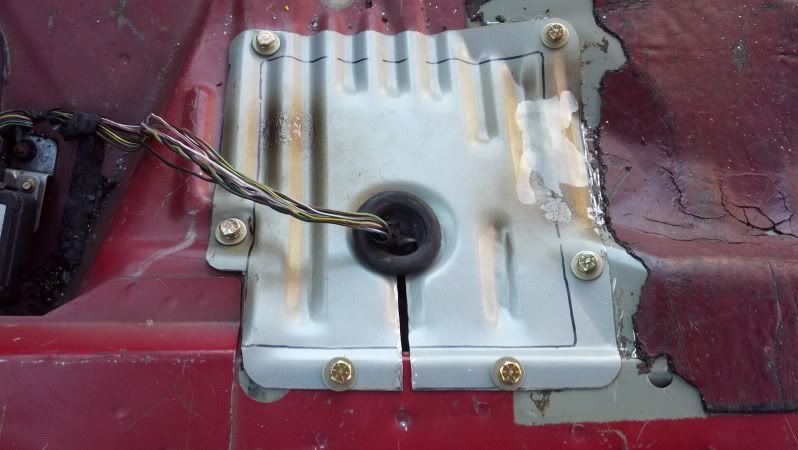
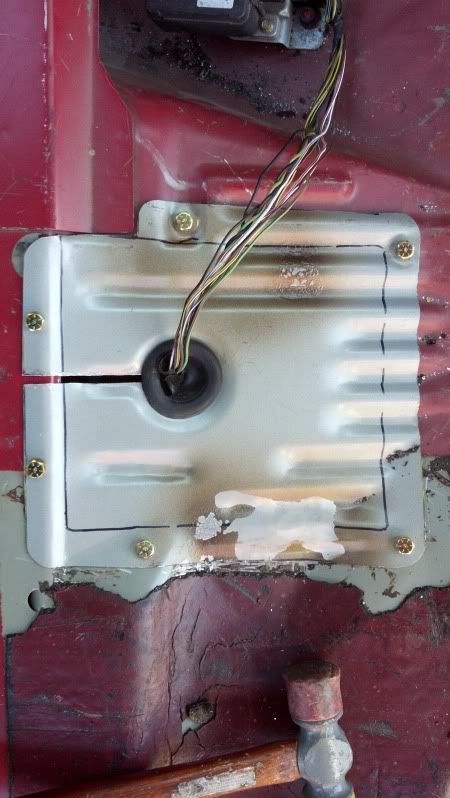
I then used the piece i cut out of the car as a template and traced that onto the piece i got from the salvage yard. I trimmed it 1" bigger than what i cut the piece out of the car. this left me with a flange area that i could then use to re-secure it to the car. i ordered some 1/4-20 rivet nuts from mcmaster-carr. Layed the cover piece in the car and drilled 1/8" holes through the cover and just let the bit hit the floor to mark it where to drill. i then used a stepped drill bit to drill the holes for the rivet nuts. Riveted those in and the drill the holes in the cover bigger to allow the 1/4-20 bolts to slide through.
![Image]()
![Image]()
![Image]()
![Image]()
![Image]()
![Image]()
Please take note that the above pics are from both of my Foci. I did this mod to both of them. I did it this way because the cover has the exact same grooves and angles as the floor in the car and makes for a nice tight, flush fit. I'm not done with it yet. i plan to sandblast my covers and paint them. I'm also going to use some rubber edge trim and urethane weather stripping to seal the cover to the floor. i will edit and update the post as i do.
Disclaimer: Do this at your own risk. This is just for reference.
This is what the area looks like. It is located under the passenger side of the rear seat.
Area marked off to be removed.
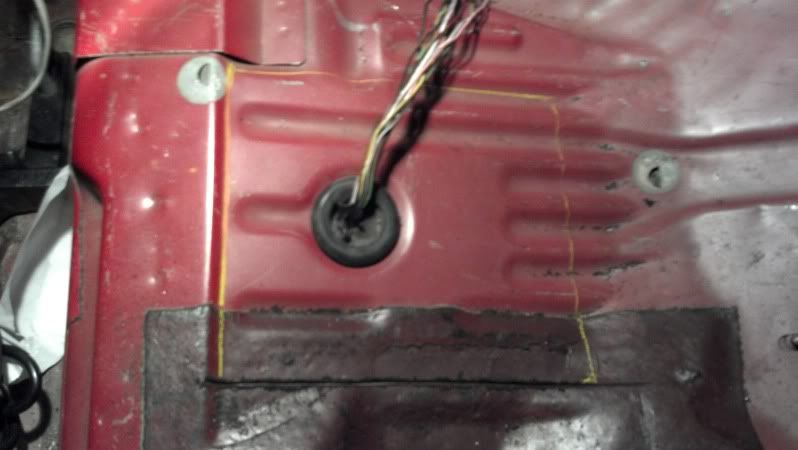

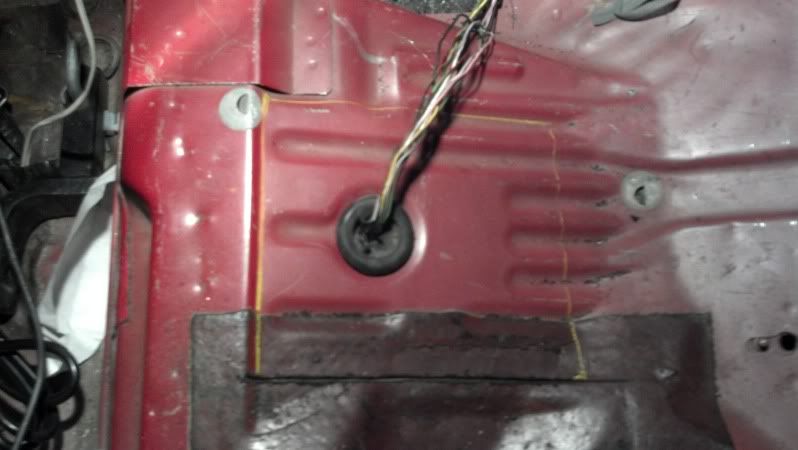
For cutting i used a Dremel and their reinforced cutting wheels. Only used 1 1/2 wheels to cut the panel out, just have to go slow. I just marked my lines then went over them slowly working through the metal. In the above pics you can see i already started cutting the one side.
Here is the piece once all cuts are made.
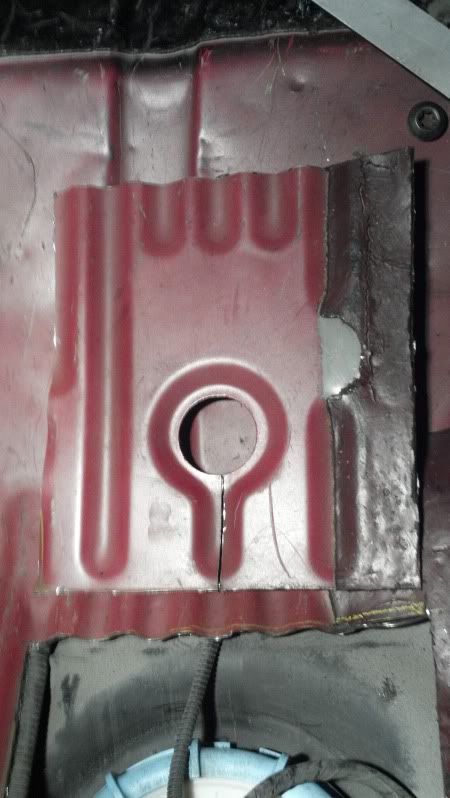
Take notice to the slit cut from the harness hole to the side. This allows the harness to be removed from the panel you cut. Had to do this because you won't be able to reach all the connectors to pull the harness through the hole.
Take note to this evap line which was not snapped into the groove on top of the tank were it suppossed to be. i knicked this and put a small hole in it that i patched with some rtv sealant.
Not in the groove.
In the groove after i snapped it back in there.
Here is the hole itself and as you can see the fuel pump module that you now have easy access to.

Now you will need to clean all of the dirt and grime off of the whole area before opening it up. Don't want to get any of this into the tank. For this i used a nylon brush and shop vac.

Now to make a door i went to a local salvage yard and cut out the floor pan area above the fuel tank. I cut it over sized so that i would be able to trim it to fit.
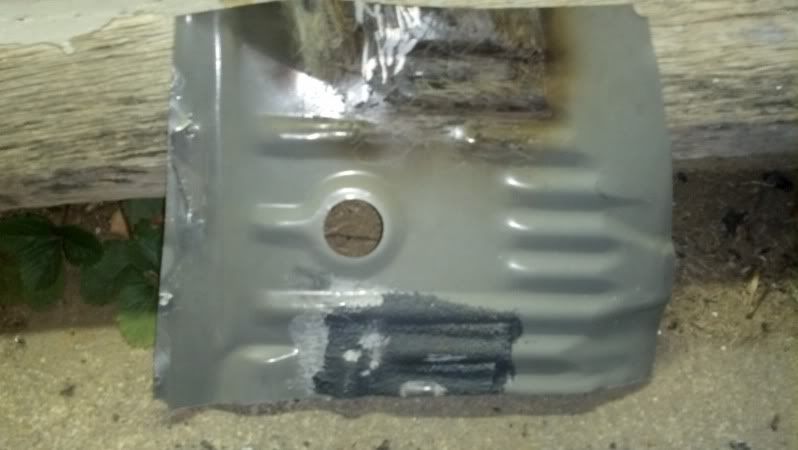
There is some under coating/sound deadner on the underside that will need to be removed. I just used a propane torch and burnt it off.

I then used the piece i cut out of the car as a template and traced that onto the piece i got from the salvage yard. I trimmed it 1" bigger than what i cut the piece out of the car. this left me with a flange area that i could then use to re-secure it to the car. i ordered some 1/4-20 rivet nuts from mcmaster-carr. Layed the cover piece in the car and drilled 1/8" holes through the cover and just let the bit hit the floor to mark it where to drill. i then used a stepped drill bit to drill the holes for the rivet nuts. Riveted those in and the drill the holes in the cover bigger to allow the 1/4-20 bolts to slide through.
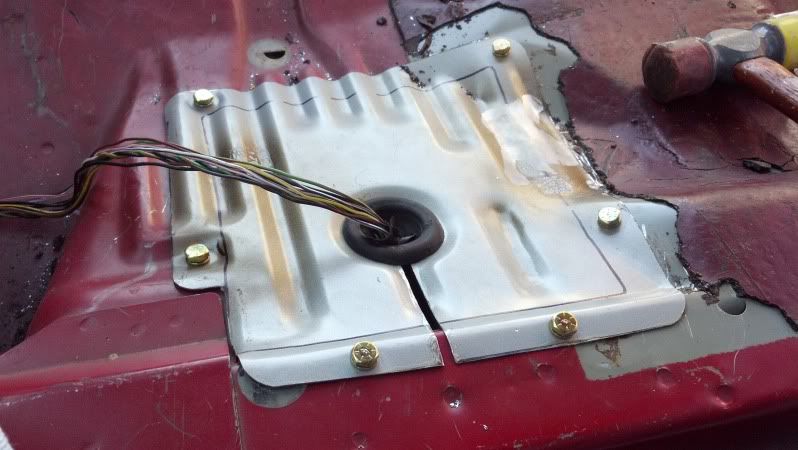


Please take note that the above pics are from both of my Foci. I did this mod to both of them. I did it this way because the cover has the exact same grooves and angles as the floor in the car and makes for a nice tight, flush fit. I'm not done with it yet. i plan to sandblast my covers and paint them. I'm also going to use some rubber edge trim and urethane weather stripping to seal the cover to the floor. i will edit and update the post as i do.
Disclaimer: Do this at your own risk. This is just for reference.
") ]
]


